


Configuration Teltonika RUT230 / RUT240 / RUT900 / RUT905 / RUT950 / RUT955 as 4G router
Below, we provide a step-by-step illustrated guide for installing and configuring a Teltonika RUT230 / RUT240 / RUT900 / RUT905 / RUT950 / RUT955 as an LTE / 4G router (up to firmware version 00.07.00).
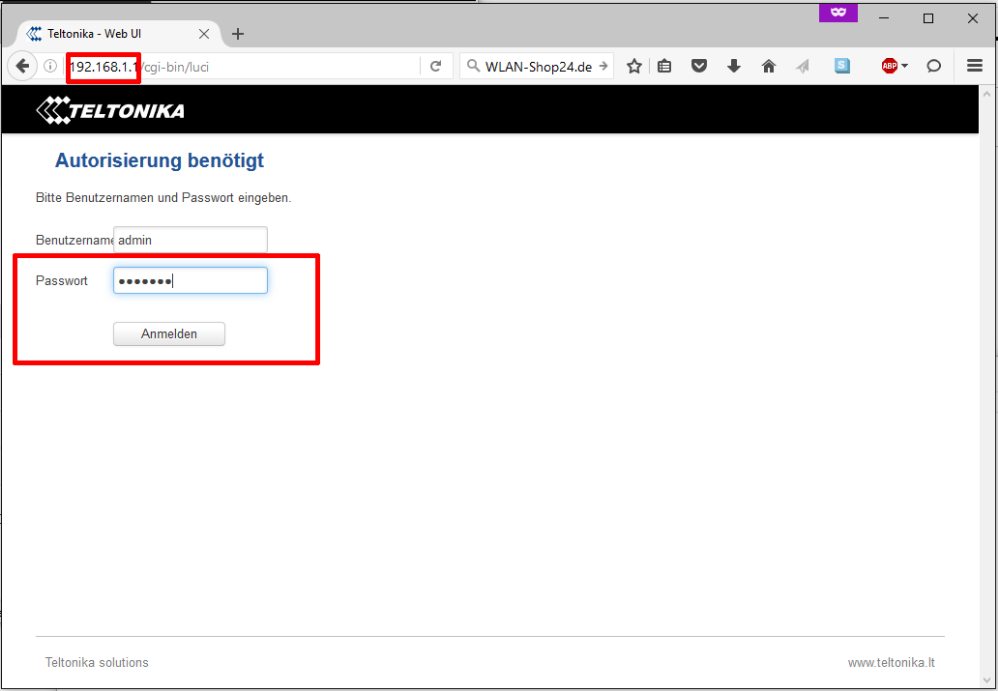
First, connect the Teltonika router to your computer using a network cable. Please disconnect your computer from the internet beforehand (if your DSL router has the same IP address as the RUT9XX (192.168.1.1), you may not be able to access the device otherwise).
Open a browser of your choice and enter 192.168.1.1 in the address bar.
The following user interface of the Teltonika router should now load:
By default, the username and password are set as follows:
Username: admin
Password: admin01
Now, click on the "Login" button.
![RUT240 - RUT9XX Configuration - Step 1]()
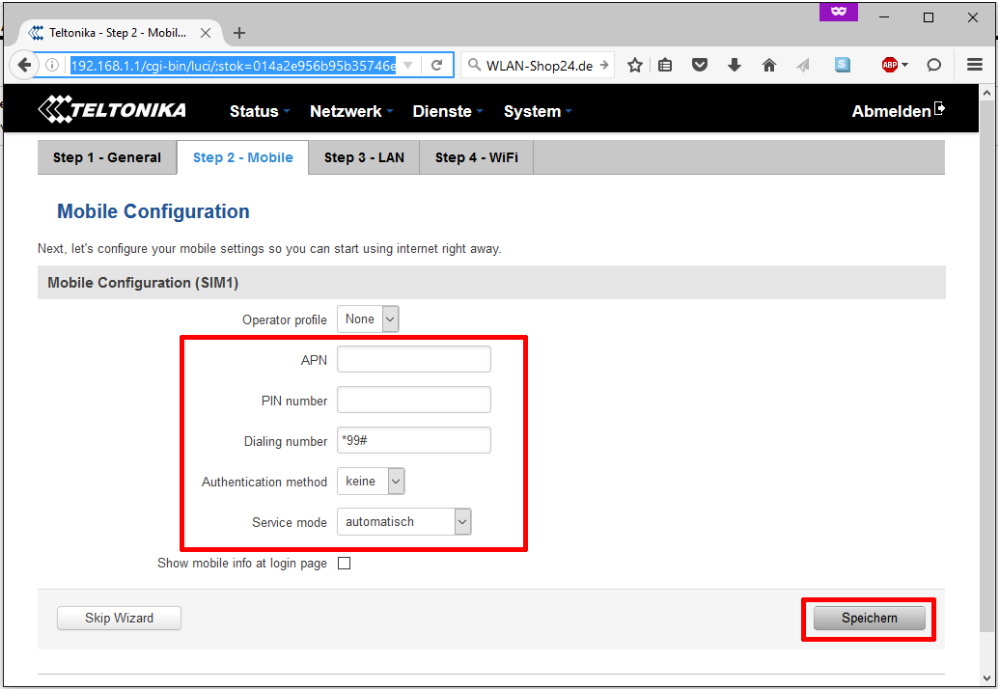
If you wish, you can now change the password (admin01) and proceed by clicking "Save". If you do not want to change it, click directly on "Step 2 - Mobile".
![RUT240 - RUT9XX Configuration - Step 2]()
Now, we proceed to the SIM card settings. APN, PIN number, and possibly the Authentication method depend on your SIM card and provider.
Example configurations can be found here: http://www.internet-ausland.de/apn-einstellungen/
The "Dialing number" is always *99#
It is best to set "Service mode" to automatic or "LTE preferred".
Click "Save" to apply the settings.
![RUT240 - RUT9XX Configuration - Step 3]()
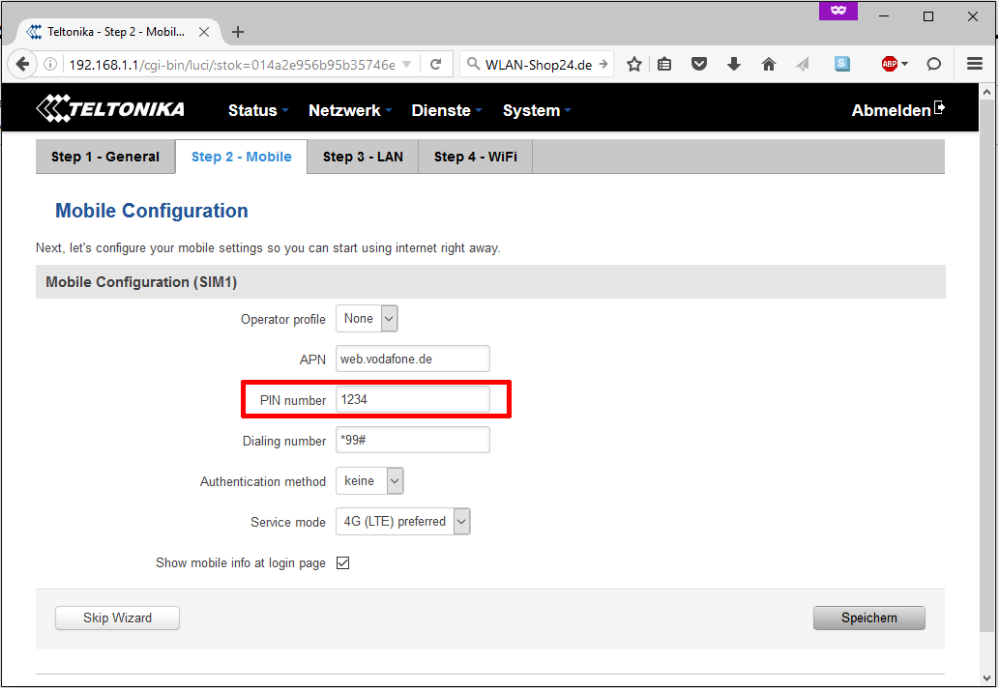
Here is an example configuration for a Vodafone 1&1 contract SIM card:
The PIN number shown is just an example; you need to enter the PIN from your SIM card if it is still PIN-protected!
Click "Save" to apply the settings.
![RUT240 - RUT9XX Configuration - Step 4]()
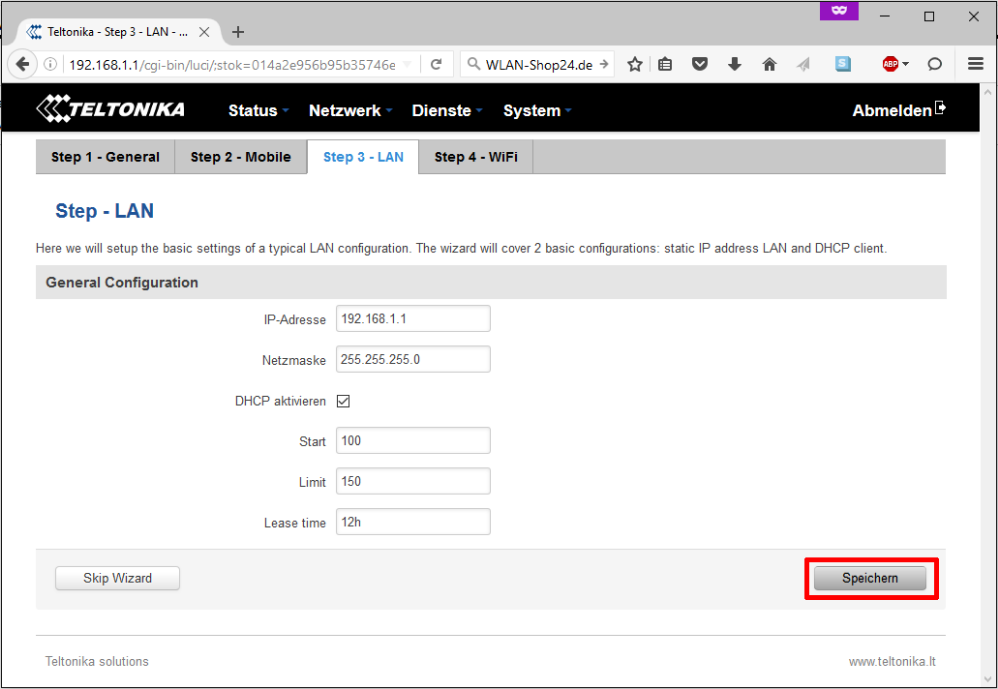
If desired, you can change the network address of the Teltonika RUT9XX here. However, in most cases, this is not necessary.
Click "Save" to apply the settings.
![RUT240 - RUT9XX Configuration - Step 5]()
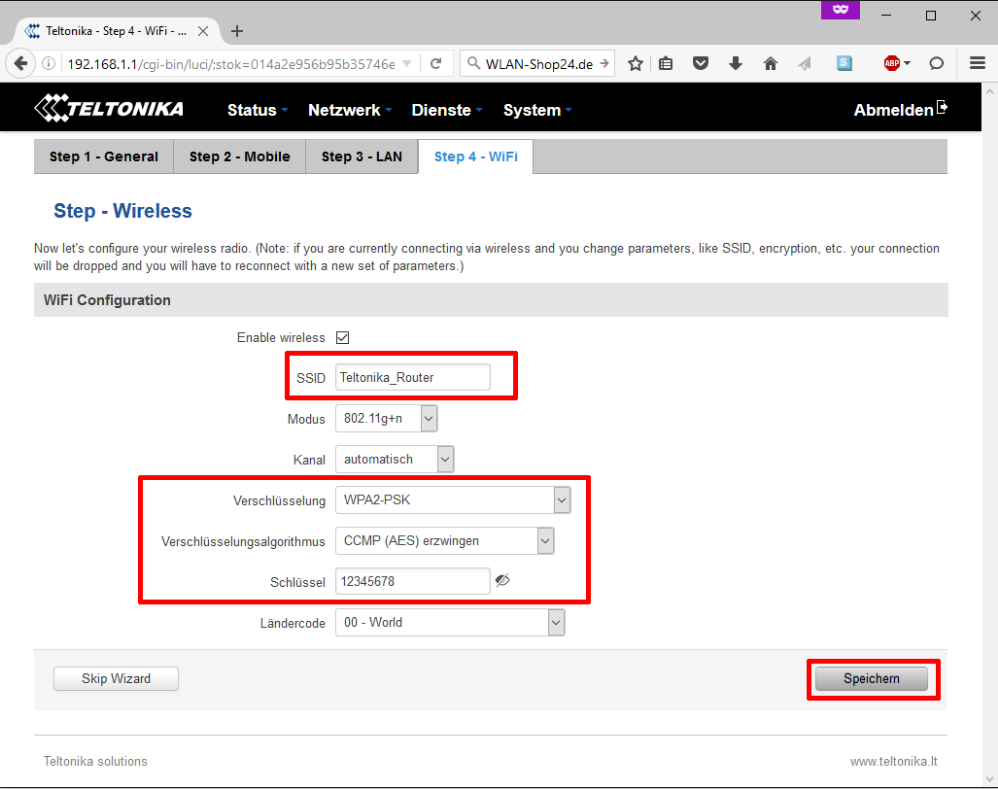
In the final step, you can configure the Wi-Fi settings of the Teltonika router. By default, Wi-Fi is unsecured, allowing anyone to access it.
In the ESSID field, you can set the Wi-Fi network name of the Teltonika router.
It is best to use the encryption and encryption algorithm settings as shown in the following image. In the "Key" field, enter the desired Wi-Fi password (at least 8 characters long).
![RUT240 - RUT9XX Configuration - Step 6]()
Now, click "Save" one last time and restart the router.
After that, you should have an internet connection via mobile network, which you can use via LAN or Wi-Fi.
To enhance the UMTS or LTE signal of the Teltonika router, you can use an external LTE antenna.
First, connect the Teltonika router to your computer using a network cable. Please disconnect your computer from the internet beforehand (if your DSL router has the same IP address as the RUT9XX (192.168.1.1), you may not be able to access the device otherwise).
Open a browser of your choice and enter 192.168.1.1 in the address bar.
The following user interface of the Teltonika router should now load:
By default, the username and password are set as follows:
Username: admin
Password: admin01
Now, click on the "Login" button.
If you wish, you can now change the password (admin01) and proceed by clicking "Save". If you do not want to change it, click directly on "Step 2 - Mobile".

Now, we proceed to the SIM card settings. APN, PIN number, and possibly the Authentication method depend on your SIM card and provider.
Example configurations can be found here: http://www.internet-ausland.de/apn-einstellungen/
The "Dialing number" is always *99#
It is best to set "Service mode" to automatic or "LTE preferred".
Click "Save" to apply the settings.
Here is an example configuration for a Vodafone 1&1 contract SIM card:
The PIN number shown is just an example; you need to enter the PIN from your SIM card if it is still PIN-protected!
Click "Save" to apply the settings.
If desired, you can change the network address of the Teltonika RUT9XX here. However, in most cases, this is not necessary.
Click "Save" to apply the settings.
In the final step, you can configure the Wi-Fi settings of the Teltonika router. By default, Wi-Fi is unsecured, allowing anyone to access it.
In the ESSID field, you can set the Wi-Fi network name of the Teltonika router.
It is best to use the encryption and encryption algorithm settings as shown in the following image. In the "Key" field, enter the desired Wi-Fi password (at least 8 characters long).
Now, click "Save" one last time and restart the router.
After that, you should have an internet connection via mobile network, which you can use via LAN or Wi-Fi.
To enhance the UMTS or LTE signal of the Teltonika router, you can use an external LTE antenna.