Configure ALFA Tube 2H as WiFi Client / Station
Below, we provide a step-by-step illustrated guide for setting up the ALFA Tube-2H as a WiFi client.
First, connect the ALFA Tube-2H to the port labeled "POE" on the PoE injector using a network cable. Then, connect a computer, laptop, or netbook to the port labeled "LAN" on the PoE injector using another network cable.
Now, open your browser and enter the IP address 192.168.2.1 to access the configuration interface.
If the page cannot be found, you may need to assign a static IP address to the computer you are using to configure the Tube-2H. Here’s how to do it:
In the bottom right corner of your Windows desktop, next to the clock, there is a computer icon. Right-click on it and select "Open Network and Sharing Center."
Click on "LAN Connection."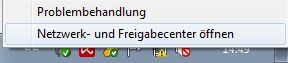
Next, click on "Properties." You may need to confirm that you want to make changes. Please confirm.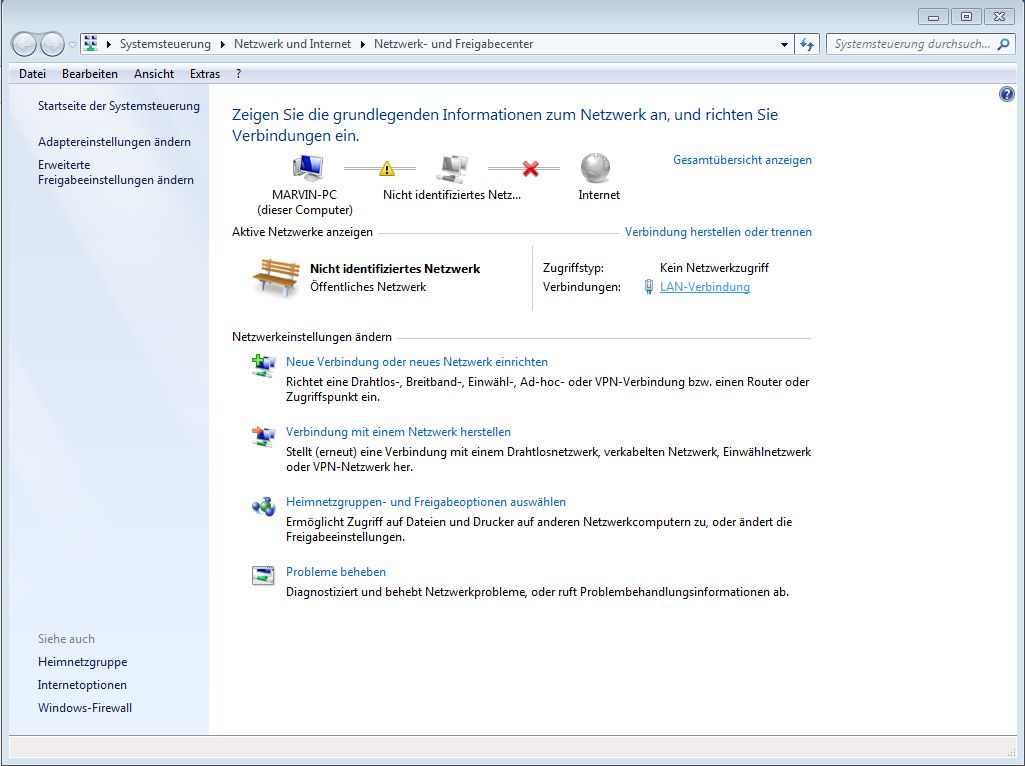
In the next window, select "Internet Protocol Version 4" and click "Properties."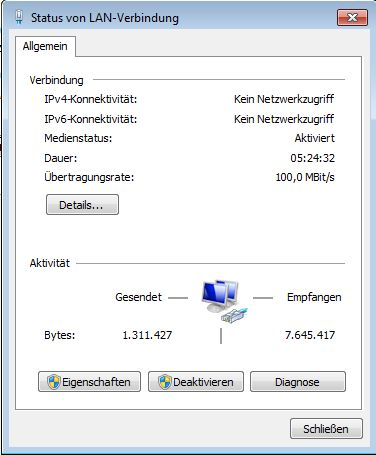
In the following window, enter the following values and click "OK."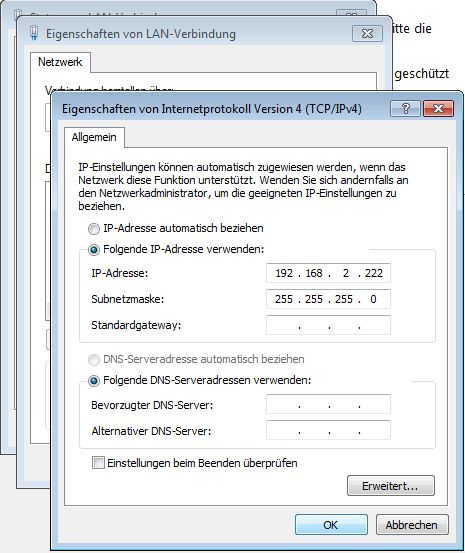
After a short moment, you should now be able to access the Tube-2H via the browser.
Log in using the following credentials:
Username: admin
Password: admin
To connect to a remote WLAN network, follow these steps:
Click on "Client Bridge" -> "Site Survey."
A list of all available networks will appear. Select the network you want to connect to by clicking "Select." Enter the network password in the "Passphrase" field. Confirm by clicking "Done." The Tube-2H will then restart.
Now, the computer’s IP address can be reset to automatic. To do this, go back to "Open Network and Sharing Center" -> "LAN Connection" -> "Properties" -> "Internet Protocol Version 4" -> "Properties" and set the settings to "Obtain an IP address automatically." Click "OK" to confirm.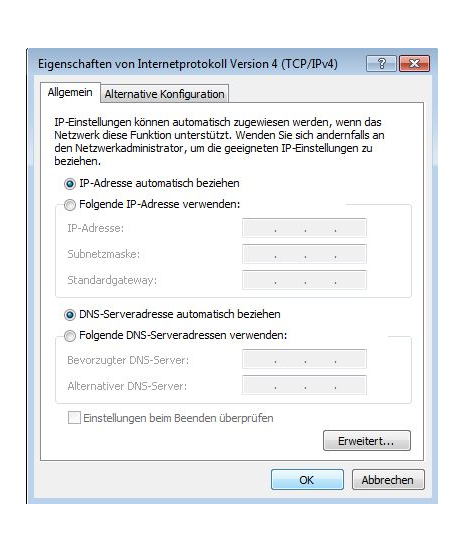
If you experience any issues, you can reset all settings on the Alfa device by pressing the reset button located next to the network port of the Tube-2H.