Configuring a Ubiquiti 5AC device
Below is an illustrated configuration guide for all 5AC devices from Ubiquiti.
The configuration is done through a web interface, which is always accessible via the address
192.168.1.20
The simplest method is to connect the Ubiquiti device directly to the computer and make some adjustments on the computer.
The Ubiquiti device is connected via an Ethernet cable to the included PoE adapter (for power) and to the computer.
The port labeled PoE on the power supply should be plugged into the Ubiquiti device. (If the device has two ports, use the MAIN port.)
The port labeled LAN should be plugged into the computer's network port.
(The first two LEDs should now light up or blink.)
[A brief explanation of the web interface and IP addresses (if needed).
If you're not familiar with IP addresses, here are a few tips that will help you.
A temporary change to the IP address of the network interface (LAN) will likely be necessary.
The quickest way to do this on Windows is as follows:
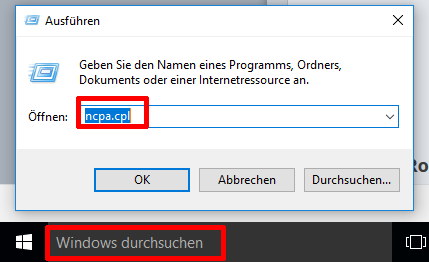
Press the keyboard combination [Win – R] (Windows key + R). Then enter ncpa.cpl and press Enter.
Now you will see the Network Connections (network interfaces, both wired and wireless).
Look for Ethernet or LAN, and if you have multiple connections, you can quickly figure out which one is the right one by unplugging and plugging them back in.
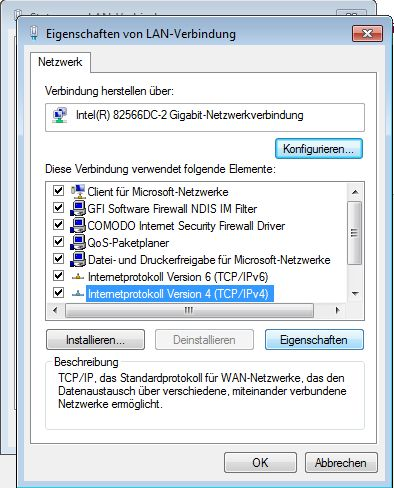
Then right-click on the connection and select Properties.

In the following window, select "Internet Protocol Version 4" and click on "Properties".
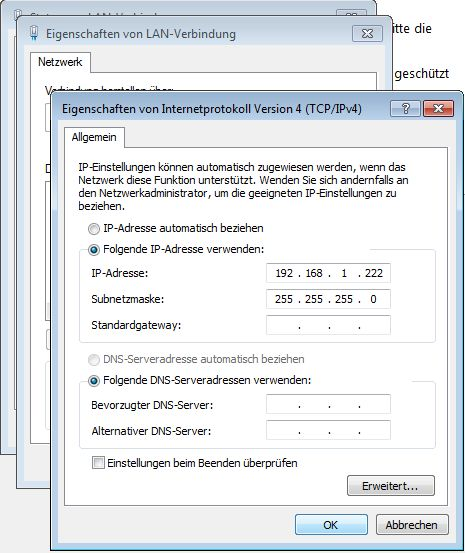
In the next window, enter the following and click "OK".
After a short moment, access to the Ubiquiti device should now be possible via the browser.
And finally, after you have finished configuring the devices, please don't forget to set everything back to automatic!

Now, for the configuration itself.
Open a modern web browser and enter
192.168.1.20
in the address bar.
This address is local to the Ubiquiti device, so no active internet connection is needed for configuration!
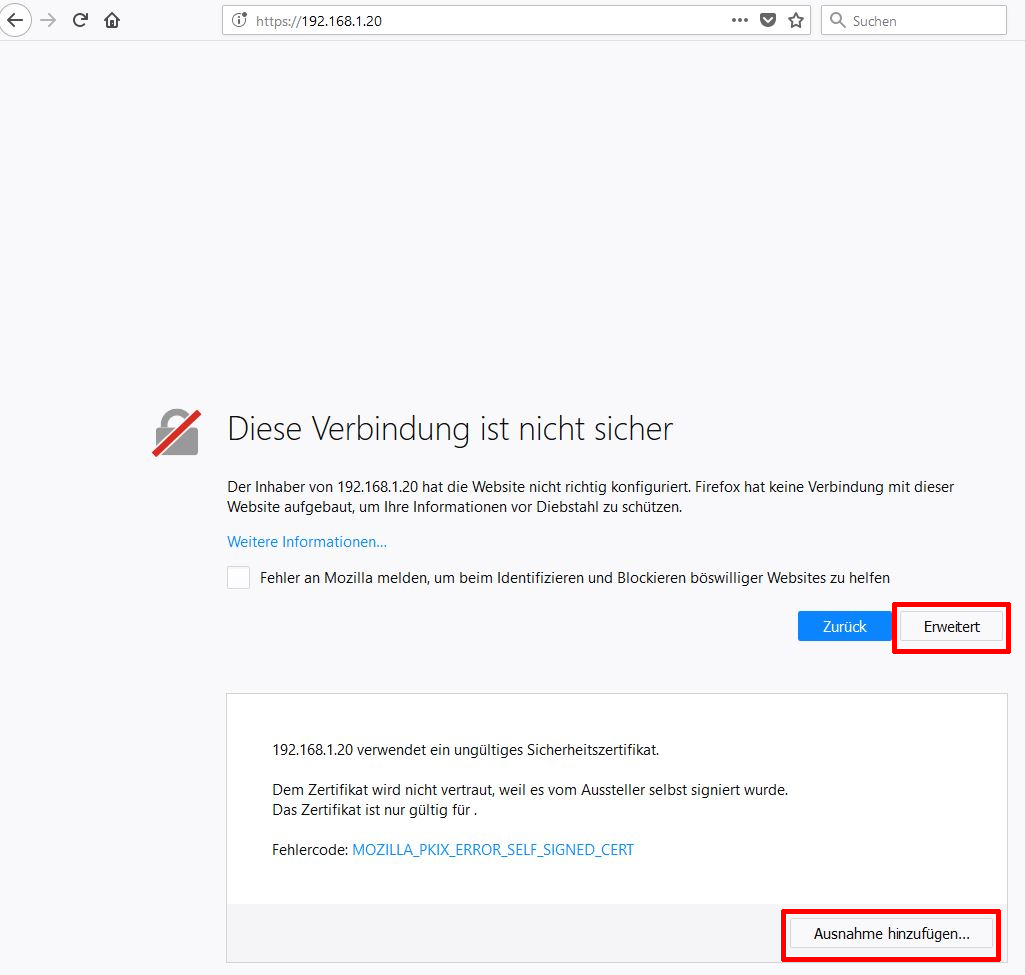
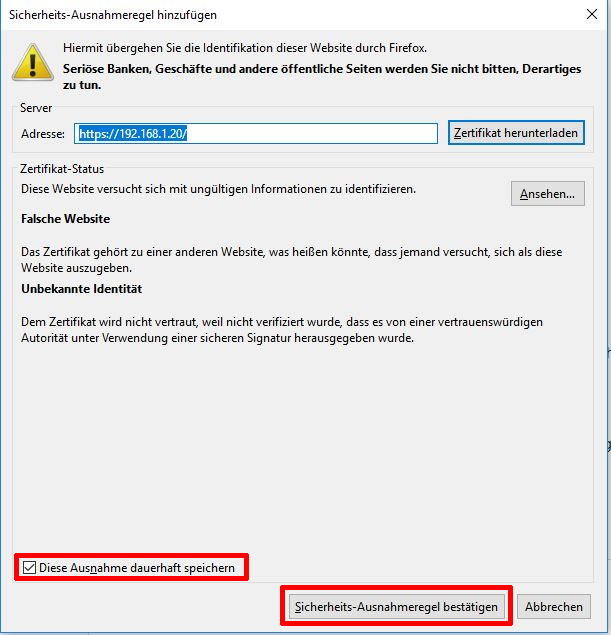
Depending on the browser, you may see a certificate error. Don't worry, you can continue normally. As mentioned earlier, this address leads locally to the device, not to a website on the internet.
In Mozilla Firefox, you can add an exception as follows (the process is similar in other browsers but may look different).
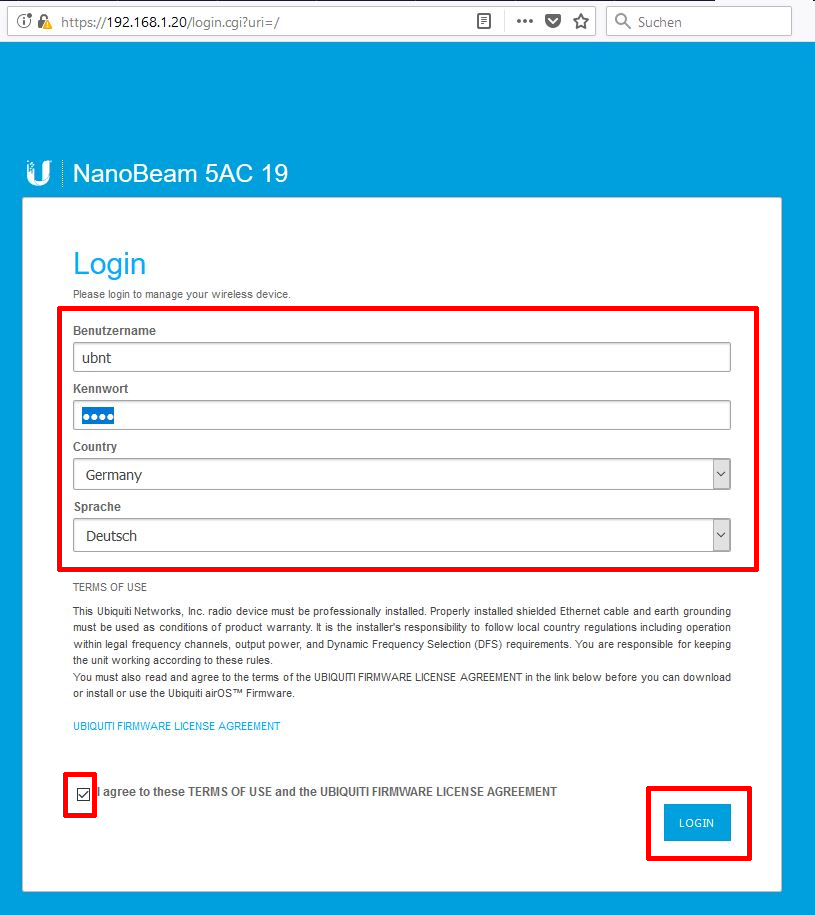
By now, you should reach the configuration interface.
Username and Password are both
ubnt
For the country, you need to set the country in which the devices will be used.
Then, make sure to check the box for the Terms of Use and click Login.
[OPTIONAL!]
It's a good idea to bring the firmware of the devices up to the latest version first.
The best way is to download the latest firmware from the manufacturer.
https://www.ubnt.com/download/#!airmax-ac
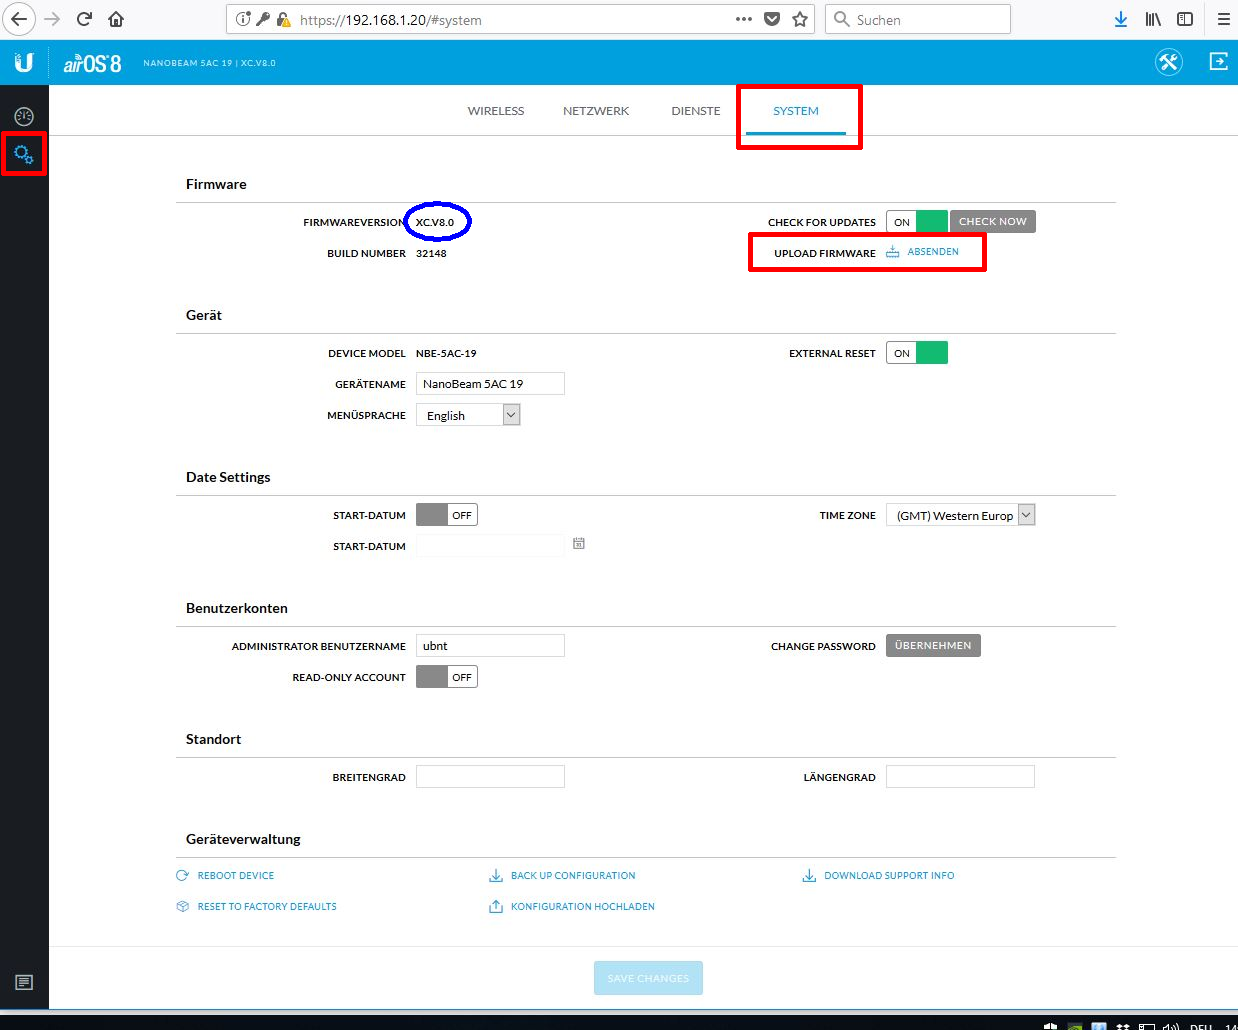
(You'll see whether you need the XC, XM, or XW version on the system page. Don't worry if you choose the wrong file, an error message will appear. Just make sure not to disconnect the devices from the power or network cable during the update.)
Download the appropriate file to your computer.
To reach the system page, click the gear icon on the left, then select the System tab at the top.
Then, under Upload Firmware, click Submit.
Now, select the file you just downloaded and click OK.
For the following prompt, select Update:
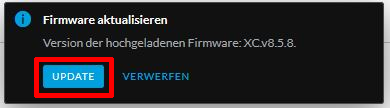
A progress bar for the update will be shown. After the update completes, you will be prompted to set new login credentials for the configuration interface.
(The factory default was ubnt for both.)
Set your desired username and password and make sure to write down these new credentials!
Now, for the configuration of the first device for the point-to-point bridge.
Click the gear icon on the left, then select the WIRELESS tab.
-Wireless Mode should be set to Access Point PtP
-For SSID, enter a Wi-Fi name for the point-to-point connection.
-Activate Control Frequency List and enter the following values:
5500,5505,5510,5515,5520,5525,5530,5535,5540,5545,5550,5555,5560,5565,5570,5575,5580,5585,5590,5595,5600,5605,5610,5615,5620,5625,5630,5635,5640,5645,5650,5655,5660,5665,5670,5675,5680,5685,5690,5695,5700
-For Wireless Security, select WPA2 Personal.
-For WPA2 Pre-shared Key, enter your desired Wi-Fi key for the point-to-point connection.
-Enable Wireless Network Protection as well.
-If the connection is under 1km, it’s also worth enabling Automatic Power Control to improve throughput.
Finally, click Save Changes to save the settings.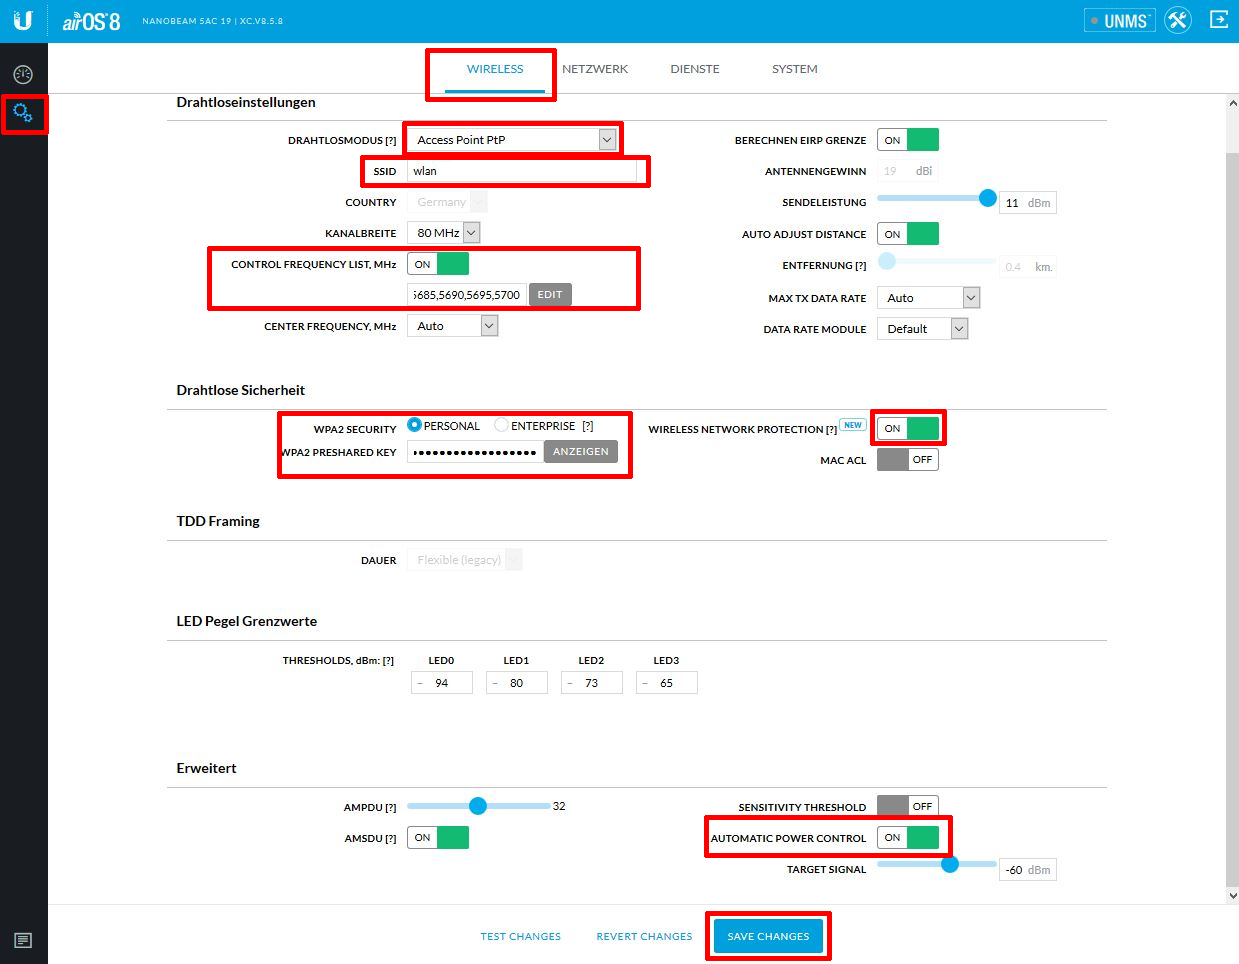
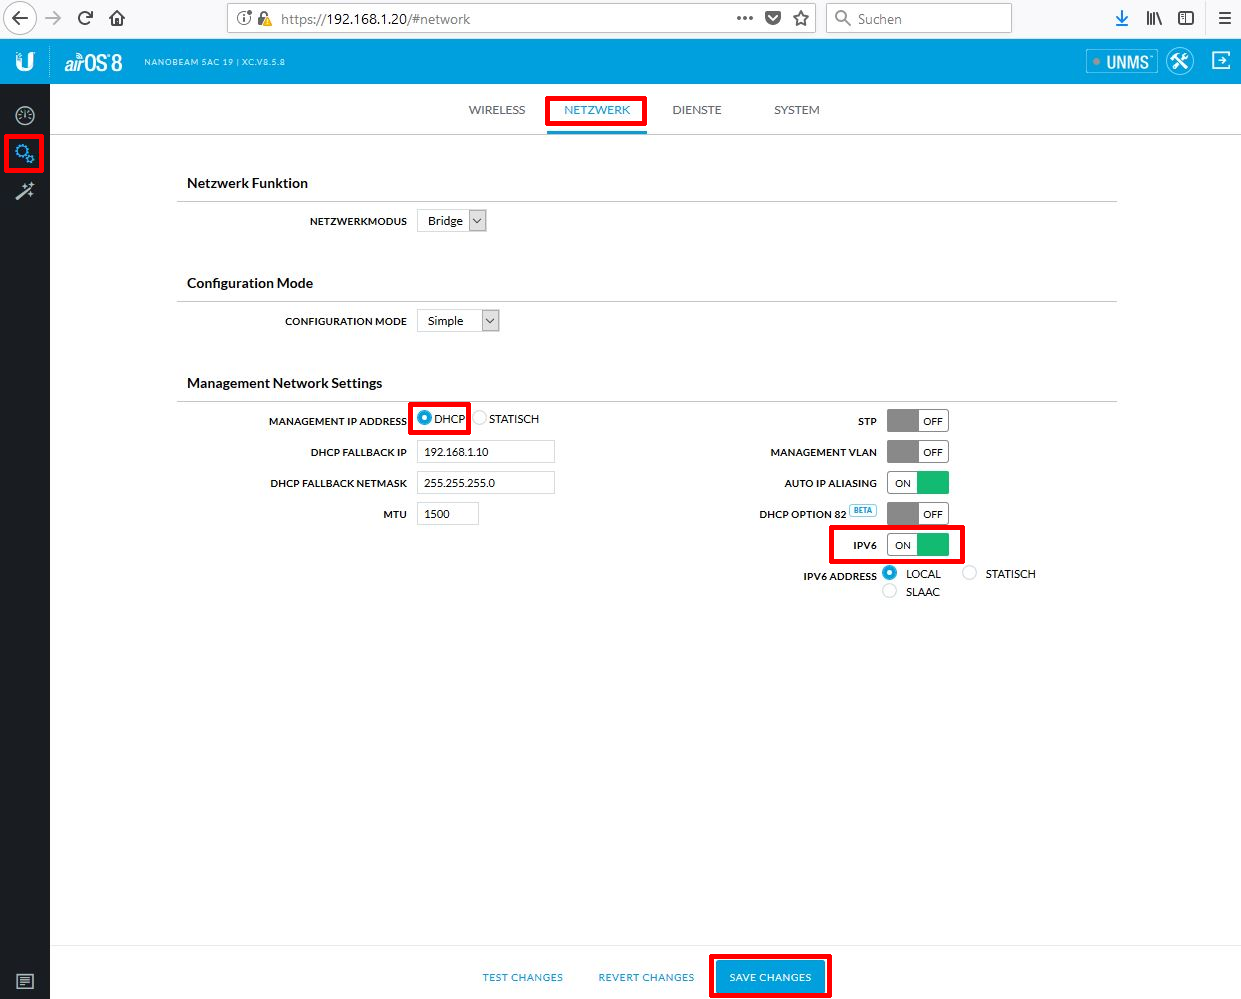
Now, for the last setting on this device.
You will need the Network tab.
If you don’t want to assign a static IP address or don’t know what that is, set Management IP Address to DHCP.
IPv6 should also be enabled for future compatibility.
Click Save Changes to save your changes.
After saving, it’s possible that the configuration interface may no longer be accessible, and the browser might show an error. This is normal and not a problem.
Please now connect the second device.
Once the second device is connected, go back to the browser and enter
192.168.1.20
Follow the same steps as for the first device.
Optionally, add an exception for the certificate.
Set the country, and log in with ubnt/ubnt.
Perform the firmware update.
Now, for the Wireless settings on the second device.
-Set Wireless Mode to Station.
-Enter the SSID name of the first device (the one you configured earlier).
-Enable Wireless Security and enter the same WPA2 Pre-shared Key you used on the first device.
-Click Save Changes to save these settings.
Finally, for the Network settings.
For this device, set Management IP Address to static and choose a free IP address (e.g., 192.168.1.21).
Click Save Changes to save this configuration.
Now, you should be able to connect both devices with a successful point-to-point bridge configuration!
--- Let me know if you'd like further clarification or assistance!