Configuration of a Teltonika RUTX09 Router
If you insert a SIM card without an active PIN request into the SIM1 slot, you do not need to configure anything and can start surfing immediately via network ports LAN1 to LAN3. (The PIN request of a SIM card can generally be disabled quickly on a smartphone or another device with a SIM slot.)
If you want to store the PIN in the Teltonika router or make other changes, the initial configuration via the router interface is as follows:
Initial Configuration
Connect to the Teltonika router via a network cable.
Open an internet browser and enter the following IP address in the address bar: 192.168.1.1
You do not need an internet connection, only a connection to the Teltonika router.
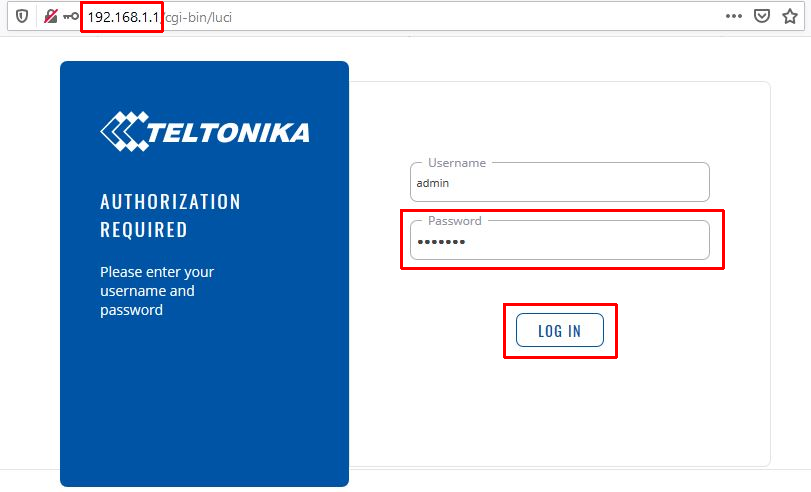
The username is: admin
The default password is: admin01
Then click Log In.

Now you need to set a new password for the router's configuration interface. This must be entered twice.
Password requirements: 8-32 characters, with at least one lowercase and one uppercase letter, and one number.
If you want to store the PIN in the Teltonika router or make other changes, the initial configuration via the router interface is as follows:
Initial Configuration
Connect to the Teltonika router via a network cable.
Open an internet browser and enter the following IP address in the address bar: 192.168.1.1
You do not need an internet connection, only a connection to the Teltonika router.
The username is: admin
The default password is: admin01
Then click Log In.
Now you need to set a new password for the router's configuration interface. This must be entered twice.
Password requirements: 8-32 characters, with at least one lowercase and one uppercase letter, and one number.
Confirm with Submit.
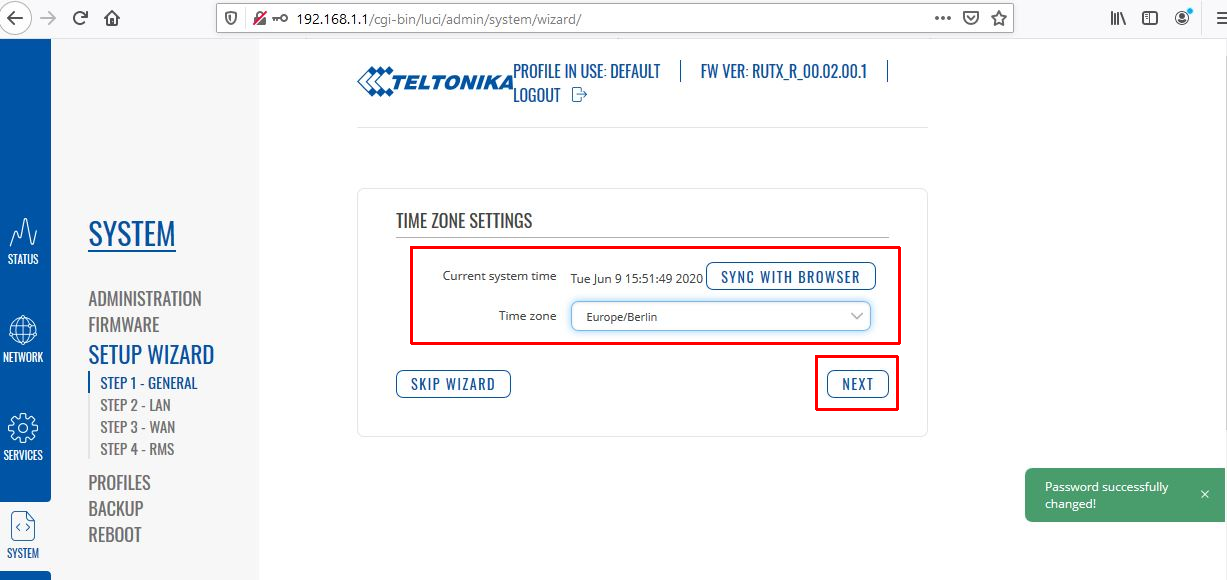
Either adopt the time zone from the browser or select it from the list.
Continue with NEXT.
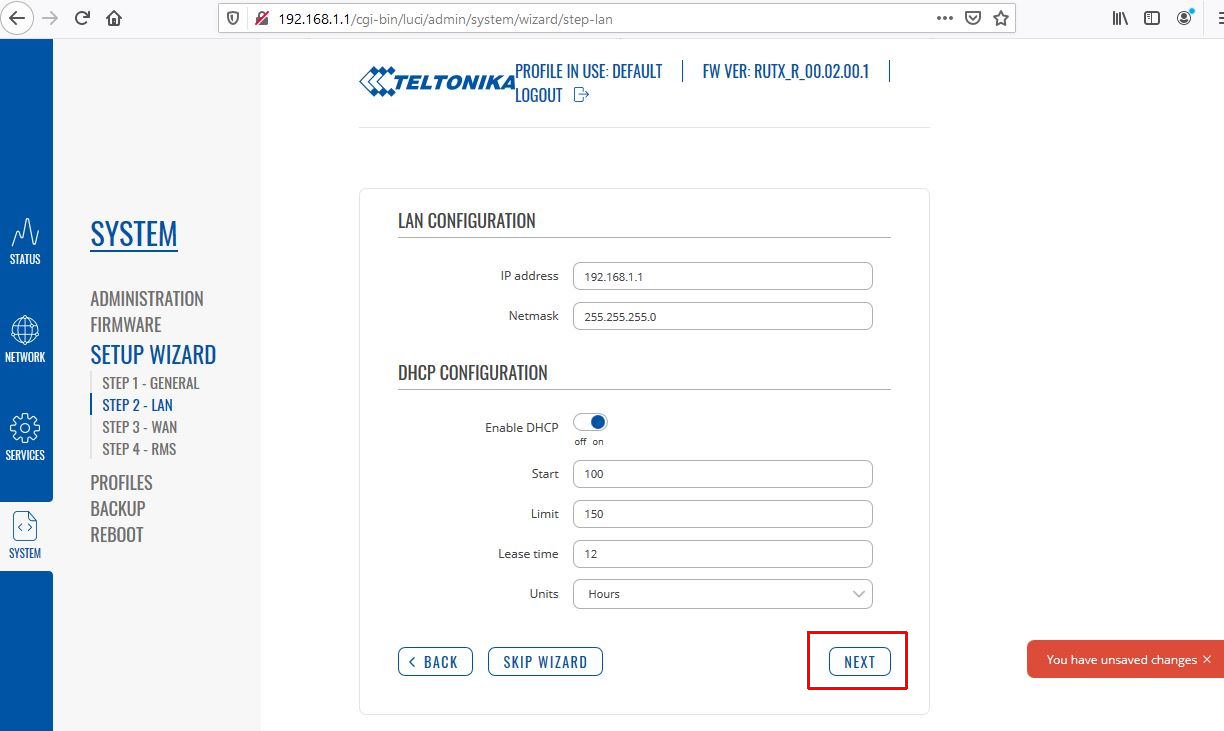
You can keep the LAN settings unchanged.
Continue with NEXT.
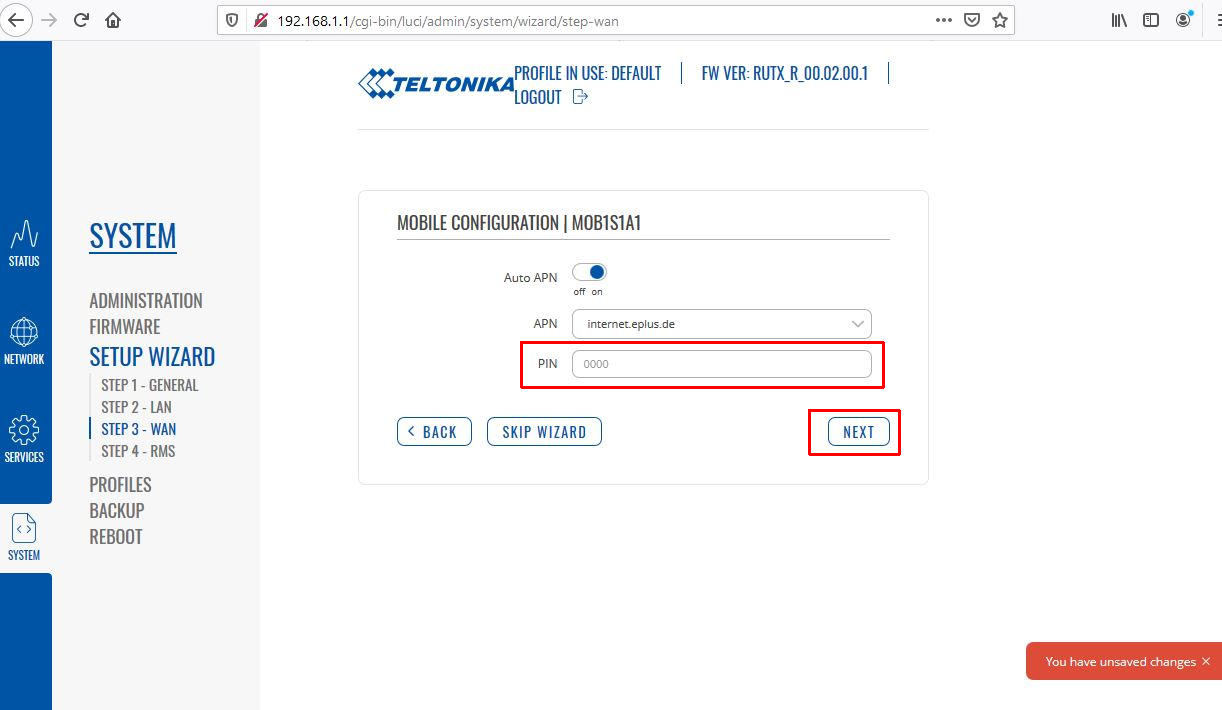
Now you can enter the PIN number of the SIM card. Auto APN usually works without problems. However, you can disable this function if necessary and enter the APN manually in the corresponding field.
Continue with NEXT.
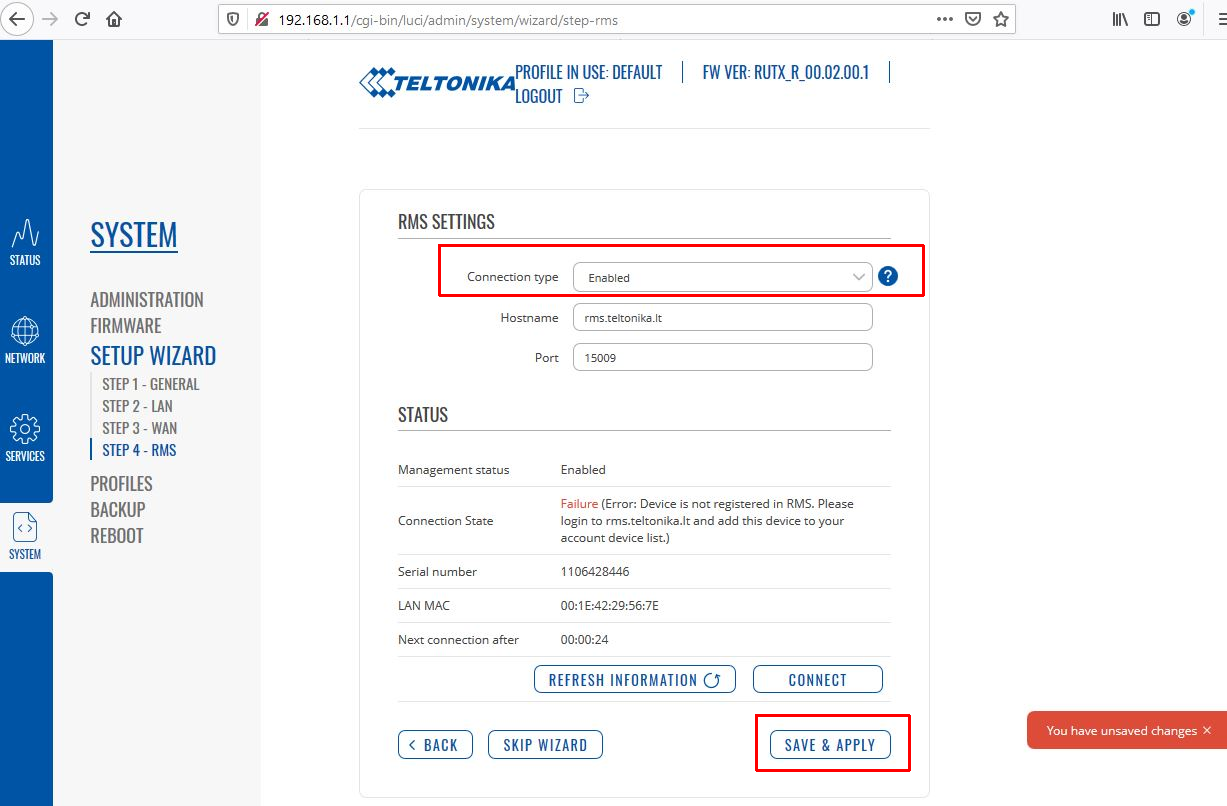
If you want to use the Teltonika RMS Cloud Management System now or in the future, it is best to leave the setting enabled.
Complete the initial configuration with SAVE & APPLY.
The device will now save the settings and display the overview page.
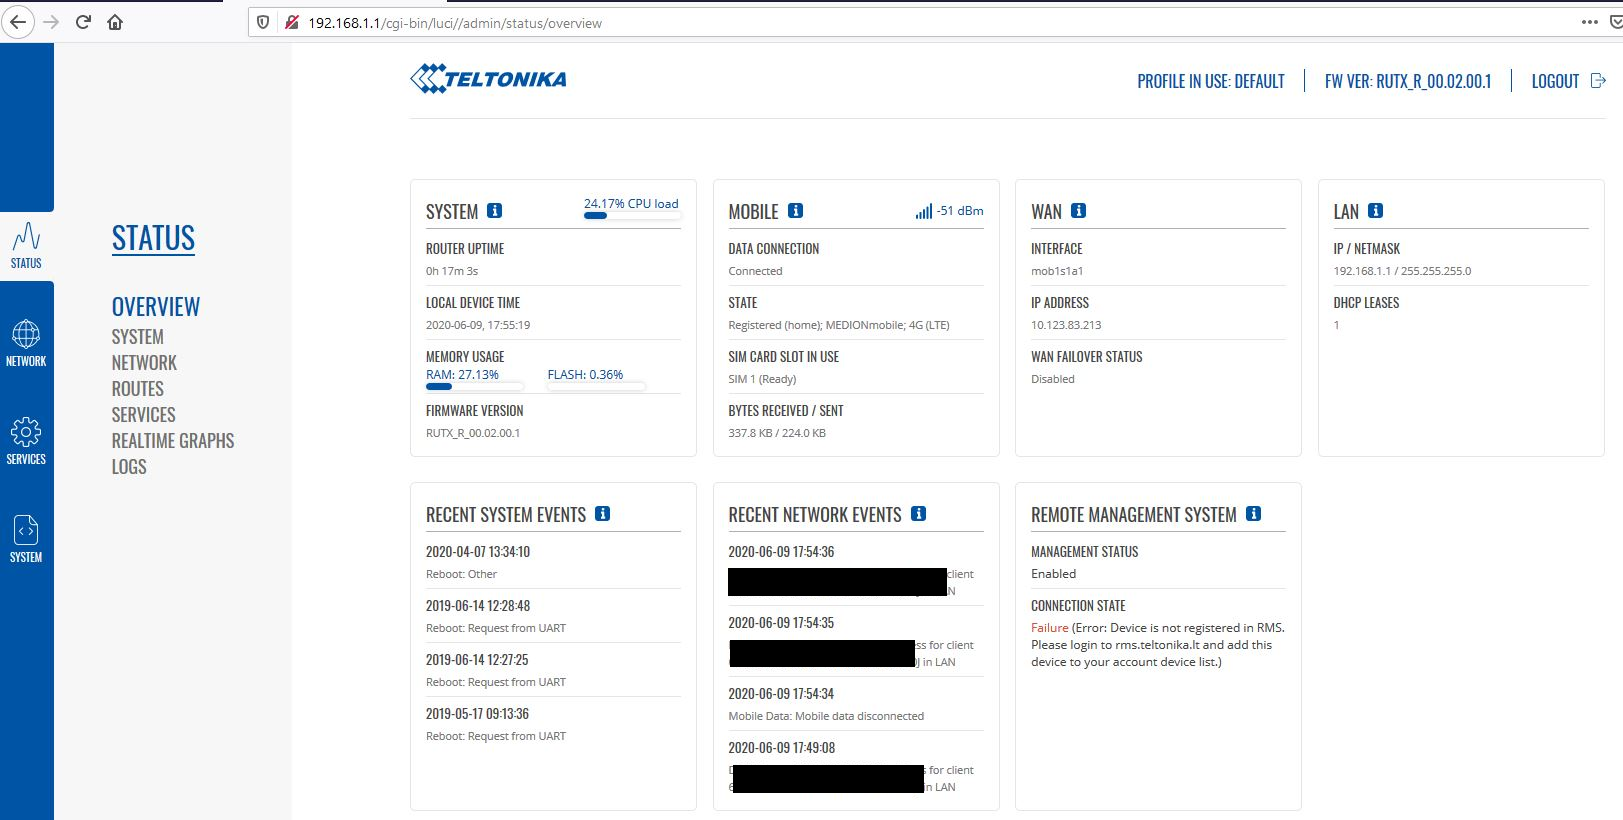
In the MOBILE section, you can see whether the device is connected (Connected) and the signal strength to the mobile tower (dBm value). The closer to 0, the better. -51 dBm is already quite optimal, corresponding to 5 bars or 5 LEDs on the device. (-100 dBm, on the other hand, would be a poor value.)
Once the device is connected to the internet, you can perform a firmware update.
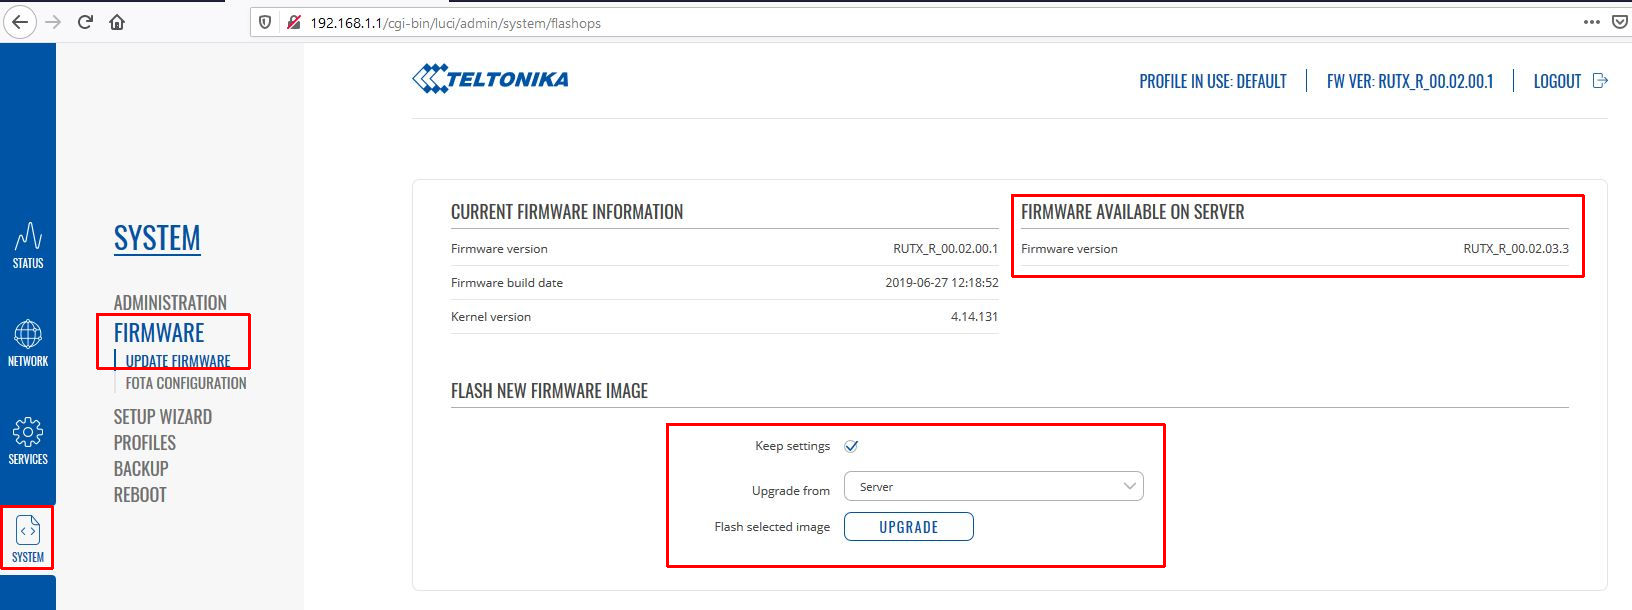
Under SYSTEM -> FIRMWARE -> UPDATE FIRMWARE, check if a newer version is available (AVAILABLE ON SERVER).
Click UPGRADE. If the Keep settings checkbox is checked, all settings remain. Otherwise, all configurations will be erased.
With Upgrade from Server, the latest version is downloaded directly from the Teltonika server.
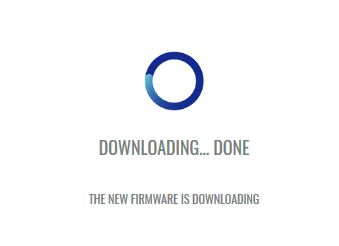
The new version is downloading.
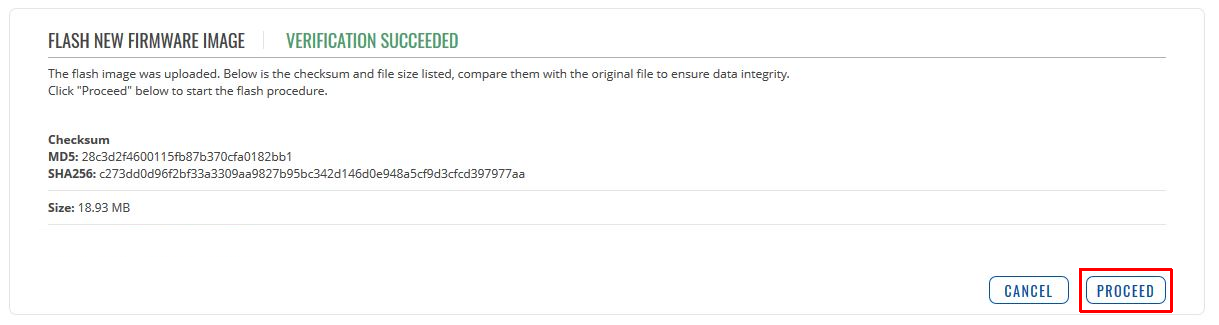
Click PROCEED to start the update process.
Do not disconnect the device from power during the update!
After the update, log in again with the new password set earlier, or simply close the browser window.
Done.