How to: MikroTik WiFi Bridge Configuration
With the help of this guide, you can easily and quickly set up a WiFi bridge in a network with a standard router (with DHCP enabled).
First, please download the latest "WinBox" utility from the Mikrotik website:
http://www.mikrotik.com/download
You can find it under "Useful tools and utilities".
Next, you can connect the first Mikrotik SXT directly to a computer using the included PoE adapter.
Now start Winbox, and you should be able to see the SXT with the IP address 192.168.88.1.
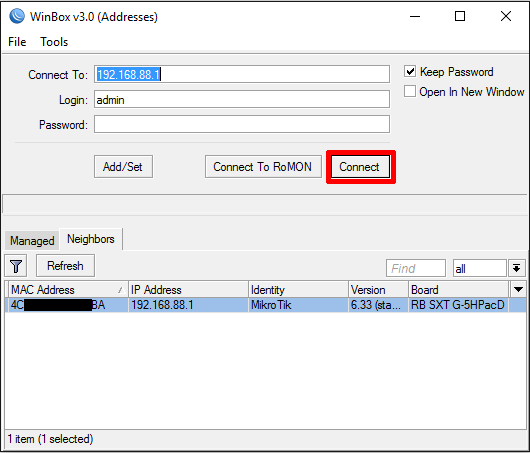
Select the SXT in the list and click Connect.
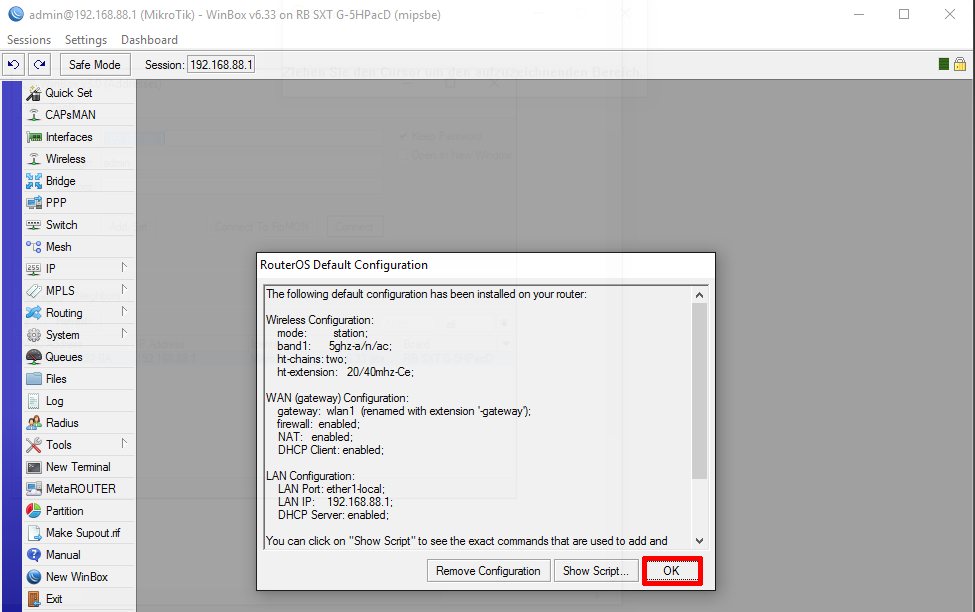
Confirm with OK.
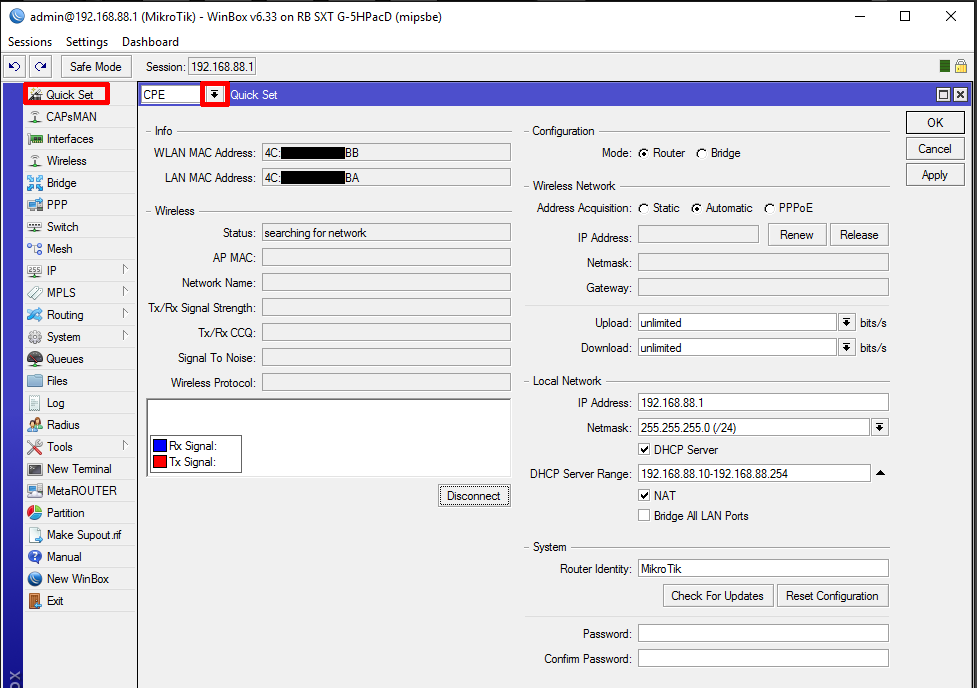
Click Quick Set in the top left, and then select PTP Bridge from the dropdown menu next to CPE.
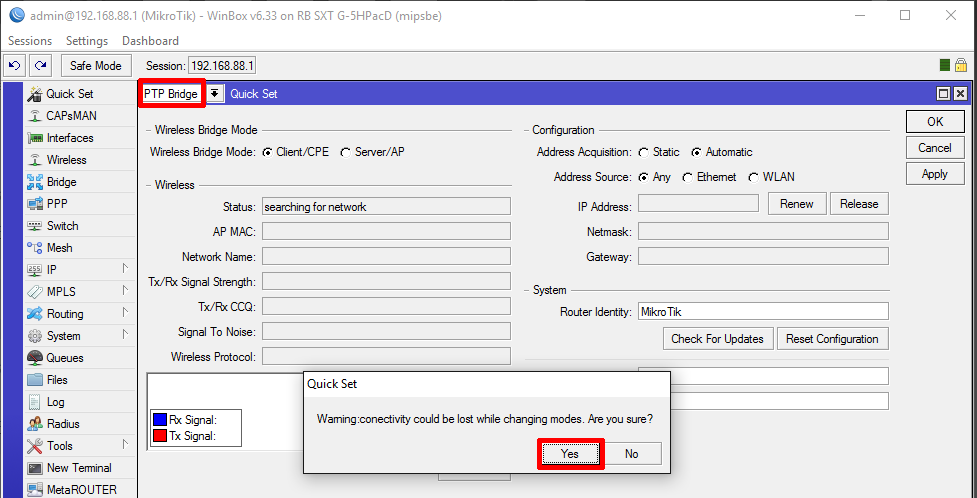
Confirm with Yes and wait 10 seconds.
After that, you can disconnect this SXT and connect the second SXT.
Now repeat the entire procedure with the second device.
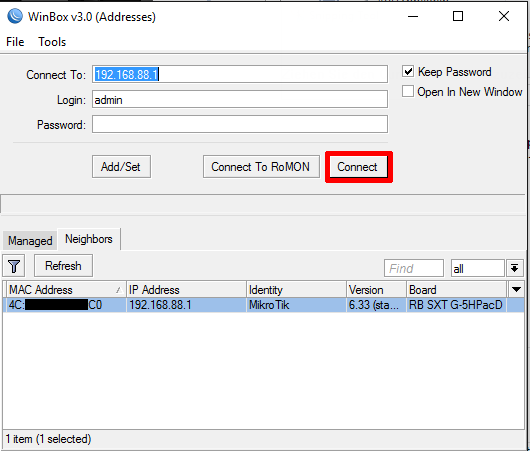
Select the SXT in the list and click Connect.
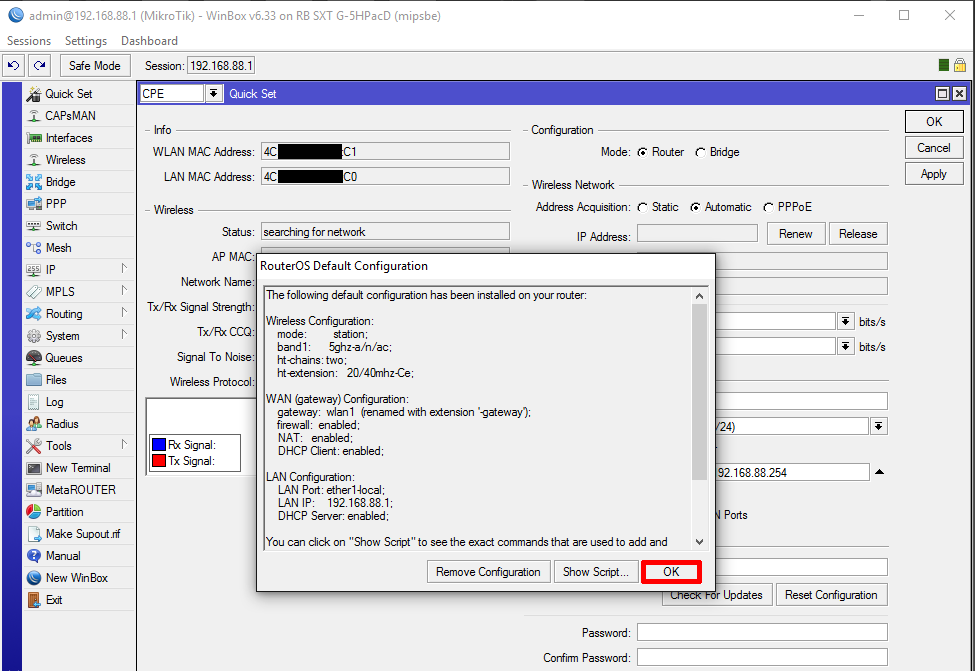
Confirm with OK.
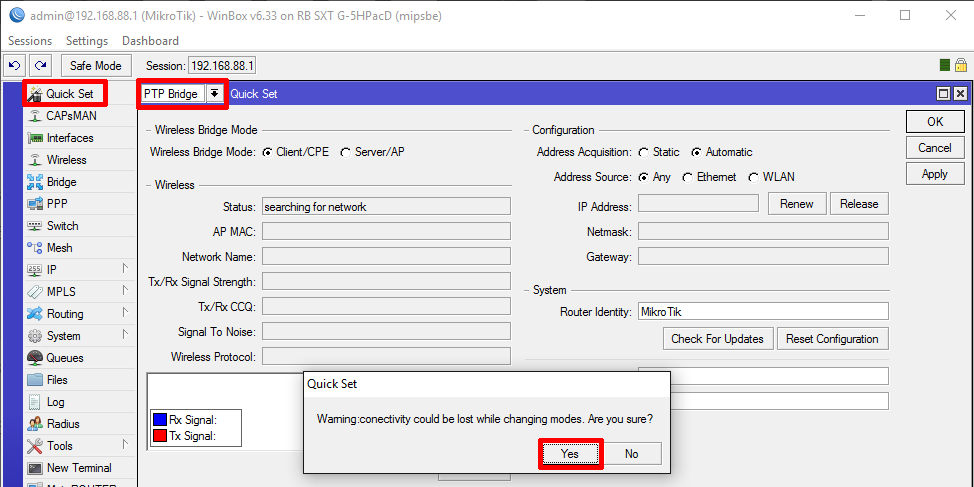
Click Quick Set in the top left, and then select PTP Bridge from the dropdown menu next to CPE.
Confirm with Yes and wait 10 seconds.
After configuring the second SXT as well, please connect both SXTs to the router or a switch in your network. Place both SXTs within range of each other or side by side.
If your computer is currently not connected to the network (e.g., because you used the network port for the SXT), reconnect it to the network now.
Now restart the Winbox software or click Refresh.
After a short time, both SXTs should appear in the list.
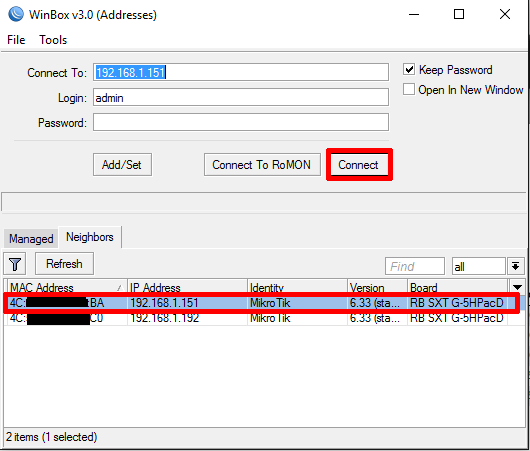
Select the first SXT and click Connect.
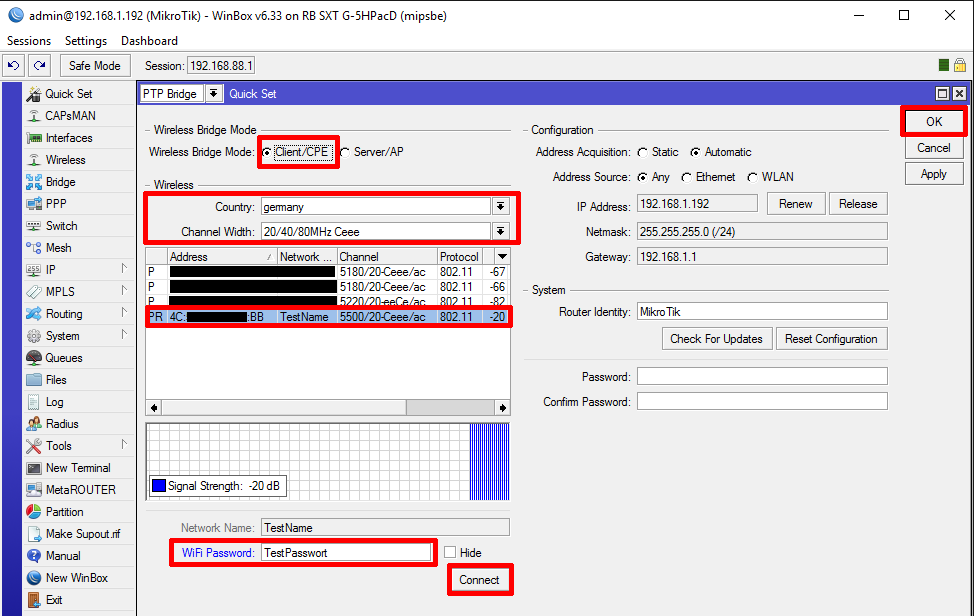
We will configure this device as the Server.
First, click Server/AP.
The following settings are examples. Please adjust the Network Name, Frequency, and WiFi Password according to your preferences.
(If you want to assign a static IP address to the SXT, set Address Acquisition to Static and enter the desired IP address for the SXT under IP Address, and the IP address of your router under Gateway.)
Finally, press Apply.
(The Winbox window will close automatically after a short time.)
Please restart Winbox.
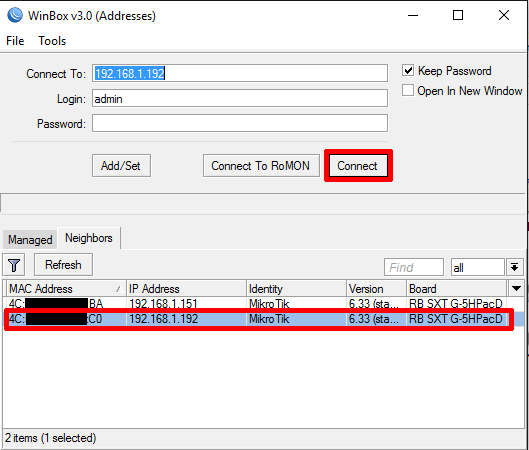
Select the other SXT and click Connect.
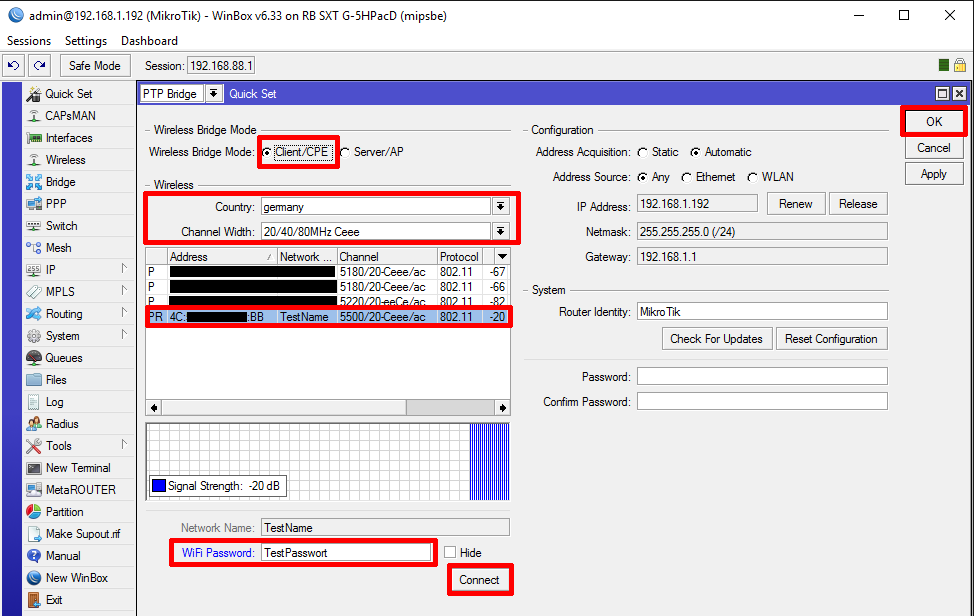
Select Client/CPE and enter the same wireless settings as on the Server.
Then, a list of all detectable WiFi networks will appear. Find the first SXT either by its MAC address or Network Name and select it from the list.
Once selected, enter the WiFi Password set on the first SXT and click Connect.
After a short time, the two SXTs should establish a connection, and the signal strength LEDs on the SXTs will start to light up.
Please confirm the settings by clicking OK.
The configuration is now complete. Under QuickSet, you can view the signal strength in dB on the devices.
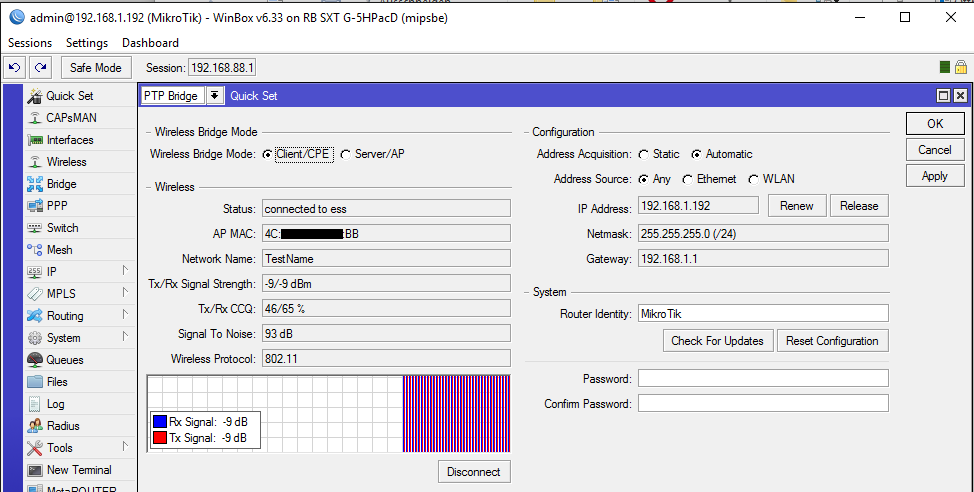
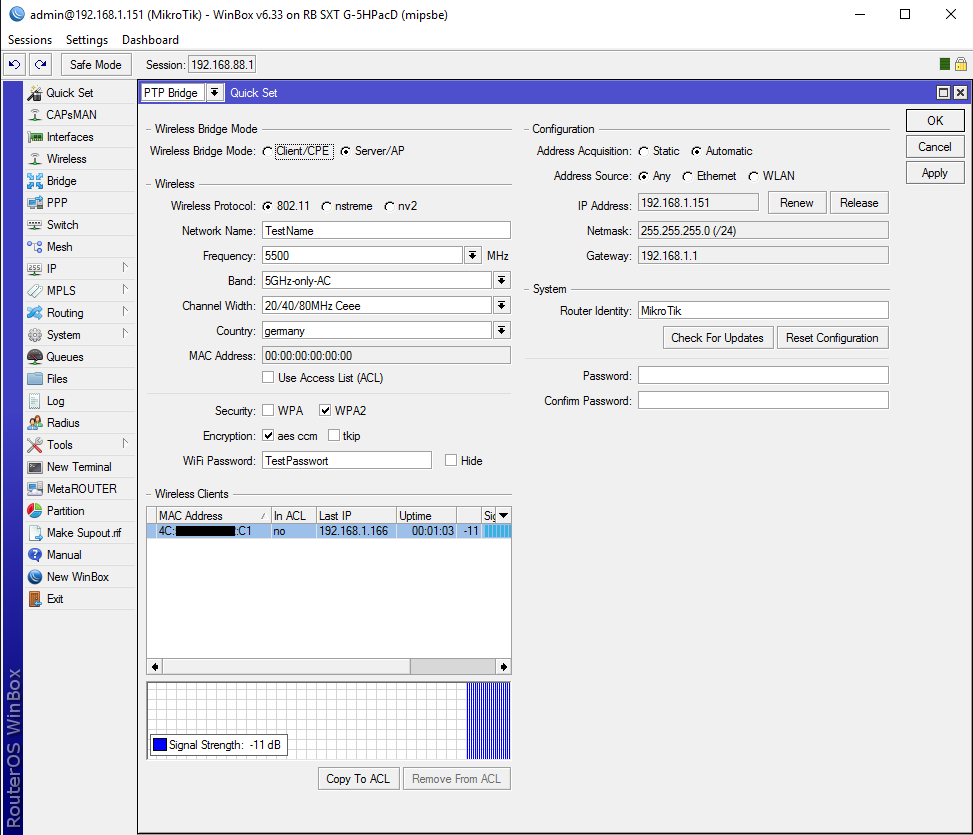
-9 or -11 are excellent values, as the devices were placed side by side. After installation, these numbers will be significantly higher. The closer to 0, the better the reception.
You can now mount the devices at your desired locations and fine-tune their alignment based on the dB value.
Voila - DONE.
If you have any further questions or issues, feel free to reach out.