Instructions UniFi Wireless Uplink
After downloading, please start the UniFi Controller installation file on a computer within the network and install the controller software and, if necessary, Java.
Now, please connect all UniFi Access Points to your network or directly to the router. The devices do not need to be at their final locations yet. It is only important that the computer with the UniFi Controller installed and the UniFi Access Points are all connected to the same router or are in the same network.
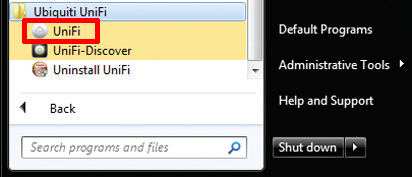
Then, launch "UniFi" on the computer.
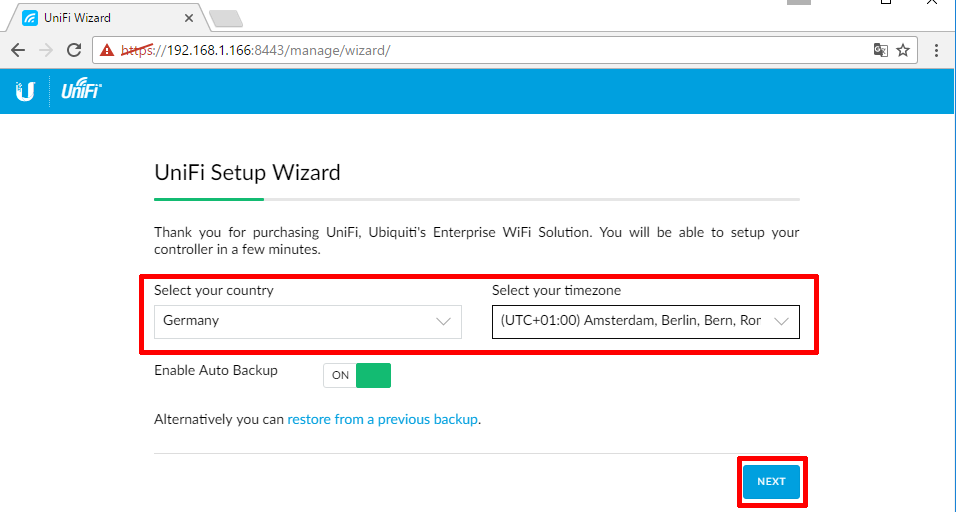
First, the country and time zone settings will appear.
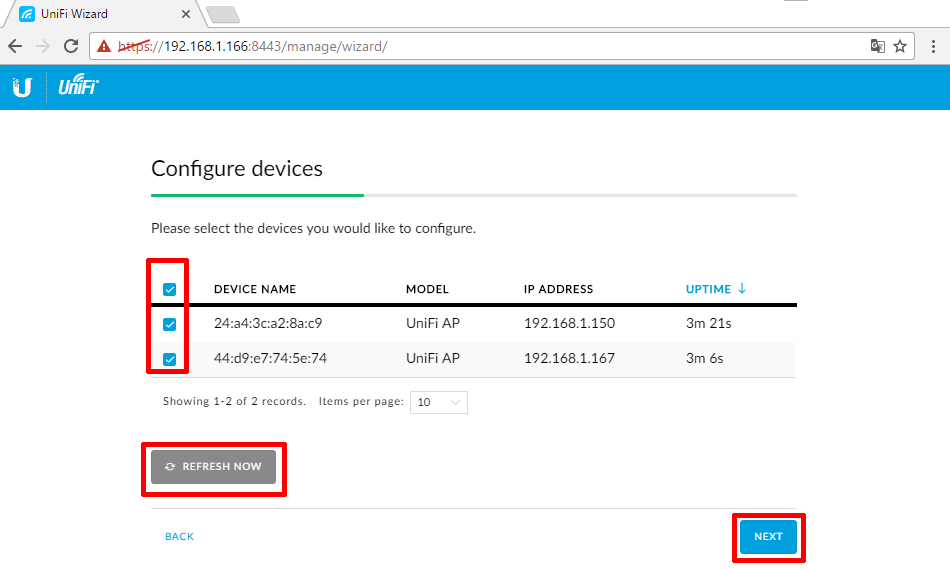
If the UAP(s) are already connected, they will now appear in the list. If not, simply connect the UAP(s), wait a moment, and then click "Refresh Now" if necessary.
Once all the UAP(s) are selected, proceed.
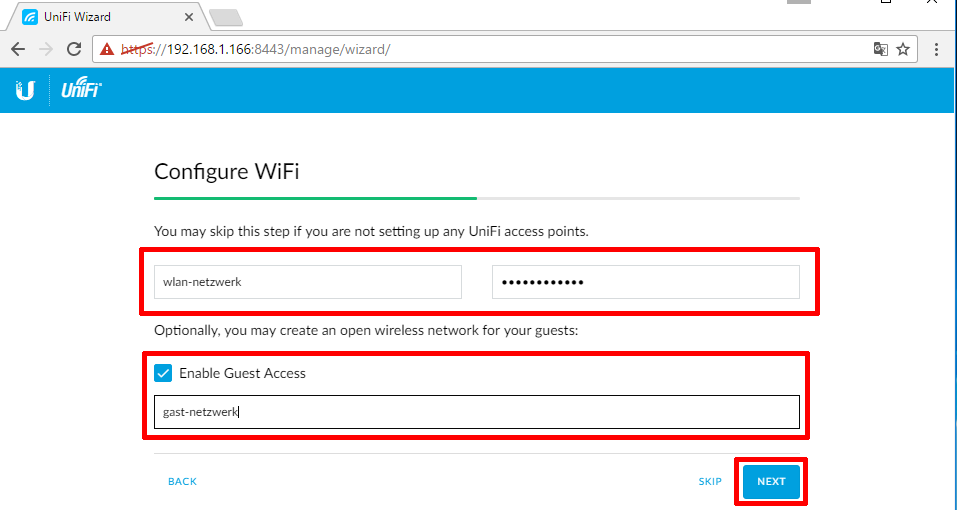
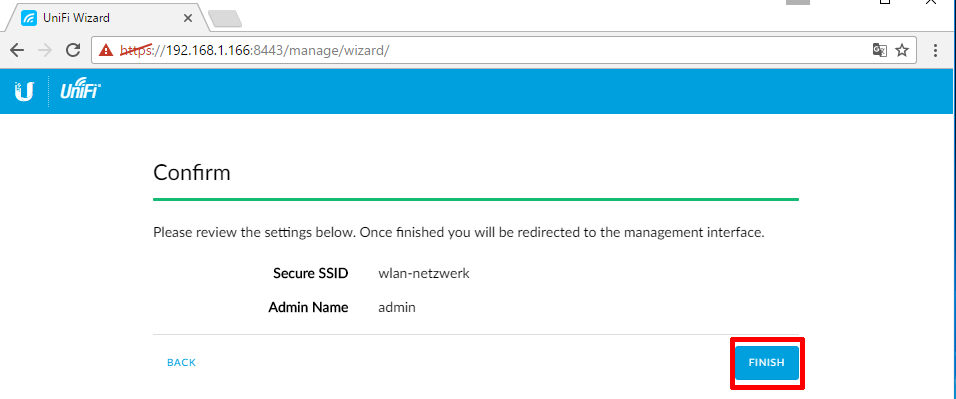
Now, specify the desired network name and the corresponding password.
Under "Enable Guest Access", you can enter the guest network name. This network is initially without a password, but you can change that later.
This part has already been partially asked earlier in the black window.
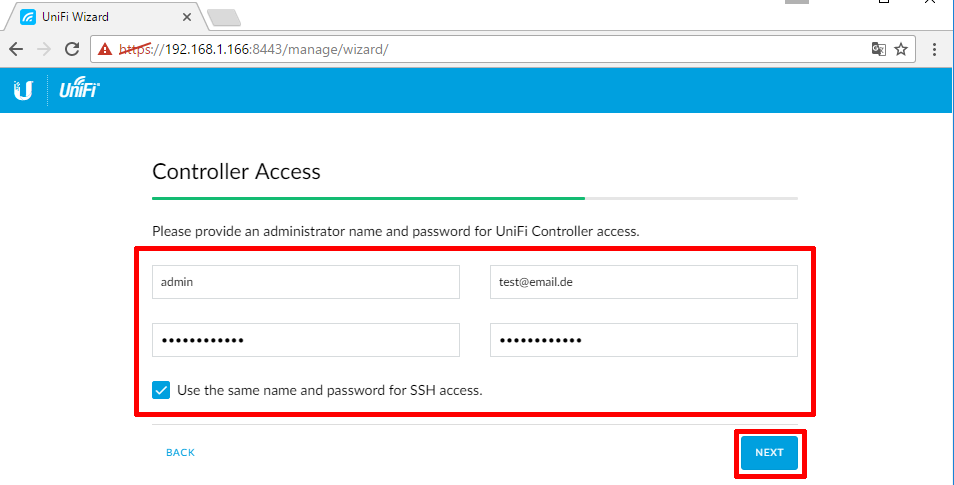
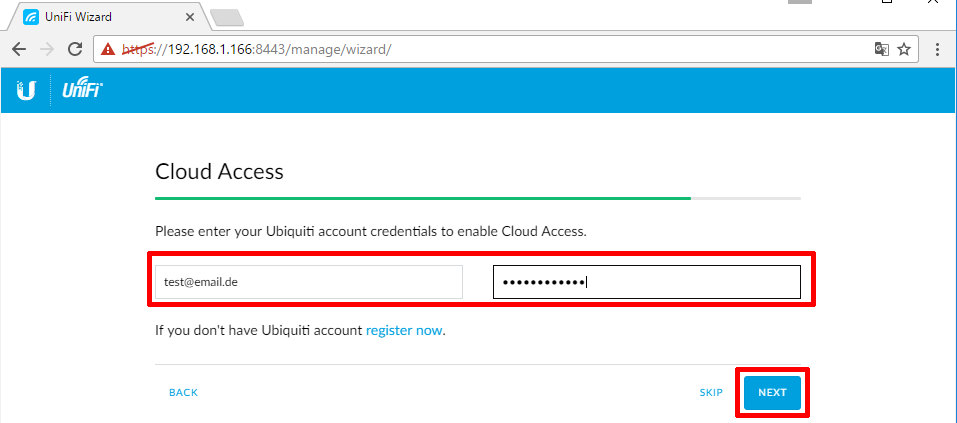
Here, the UniFi Cloud login details are requested again.
Now, complete the setup by clicking "Finish".
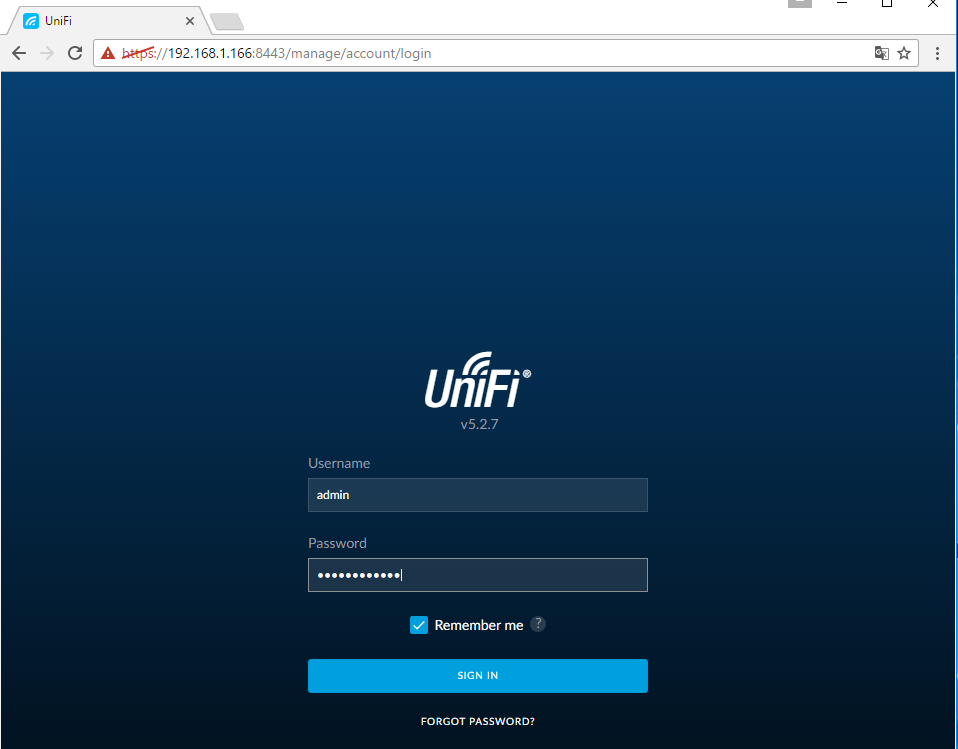
Now log in with the controller credentials (Admin + Password).
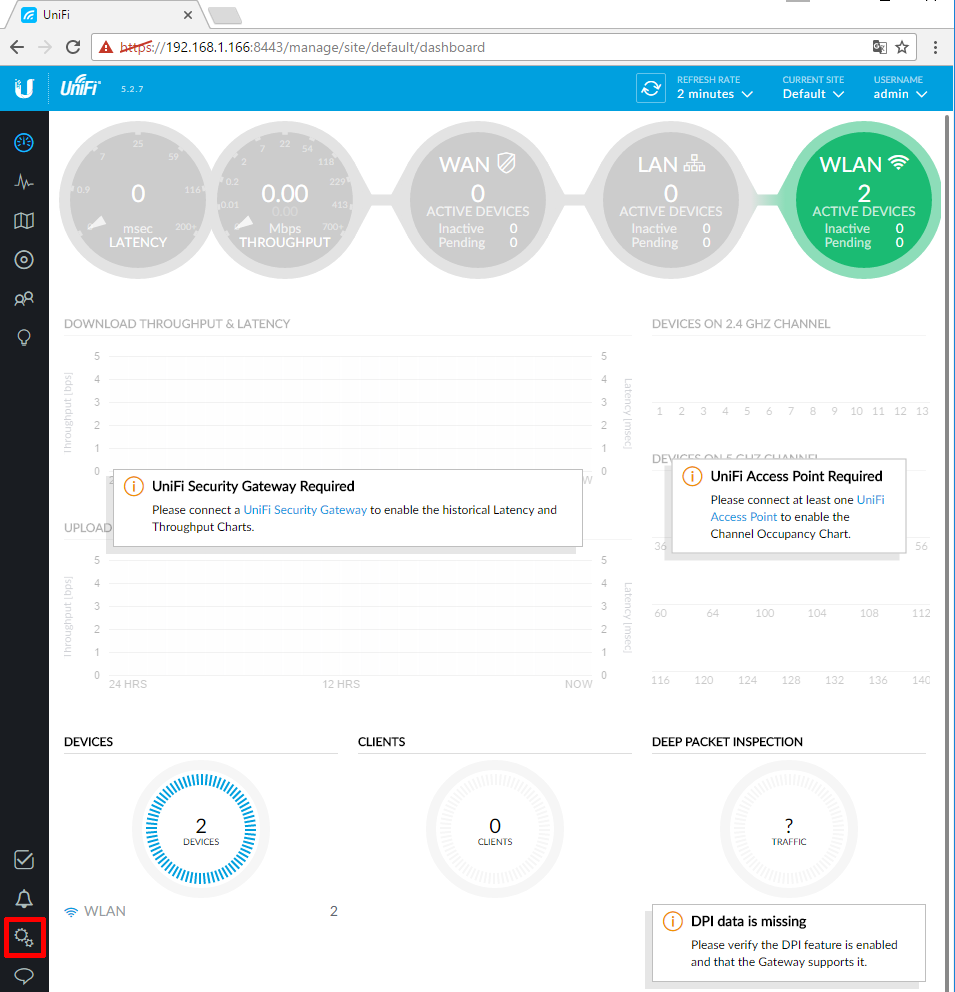
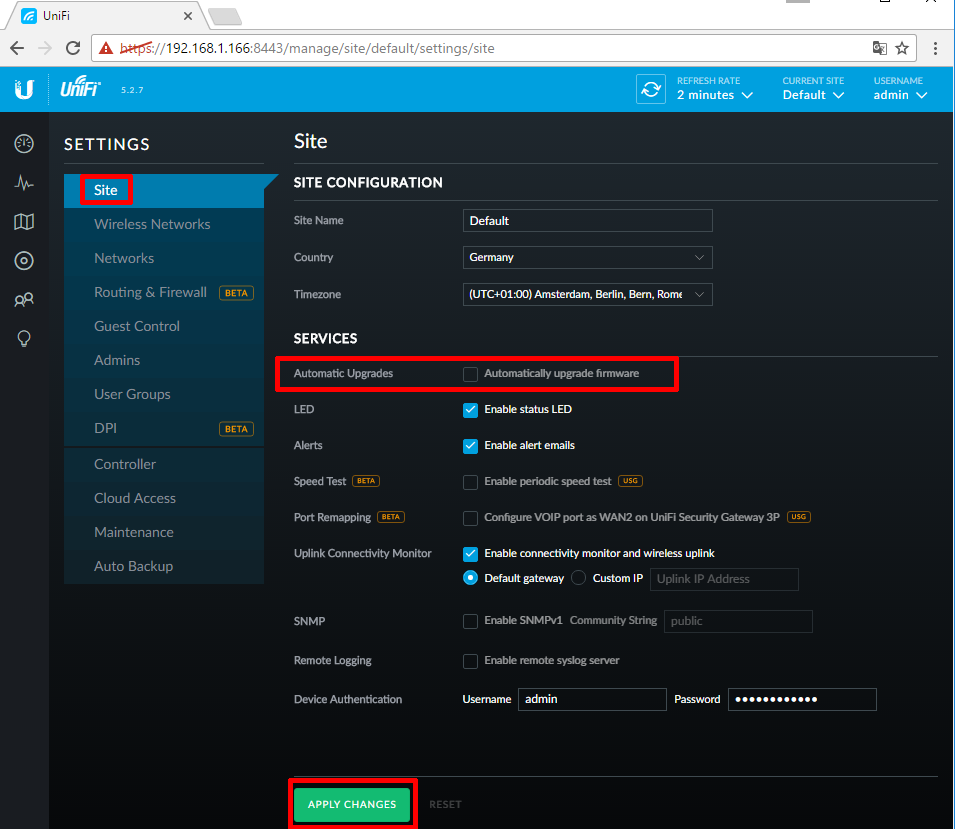
You will find the settings on the overview page at the bottom left, under the gear icon.
Under "Site", you can activate automatic updates for the Access Points if you wish.
Under "Wireless Networks", you can manage the Wi-Fi networks and, for example, set a password for the guest network.
All networks with the checkbox "Guest Network" are separated from the regular Fritzbox network and all devices logged into them are isolated from each other.
Changes can be made using the "Edit" option.
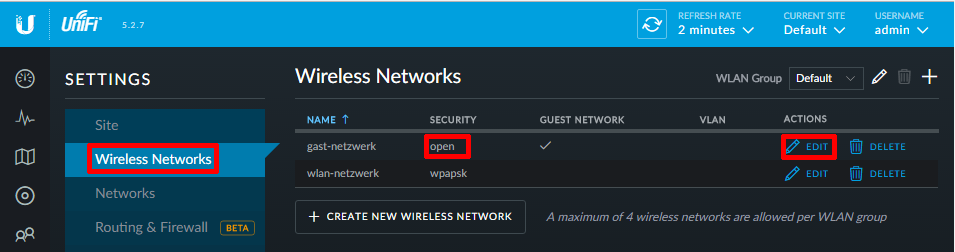
Under "Security", you can set the encryption and the corresponding password and save with "Save".

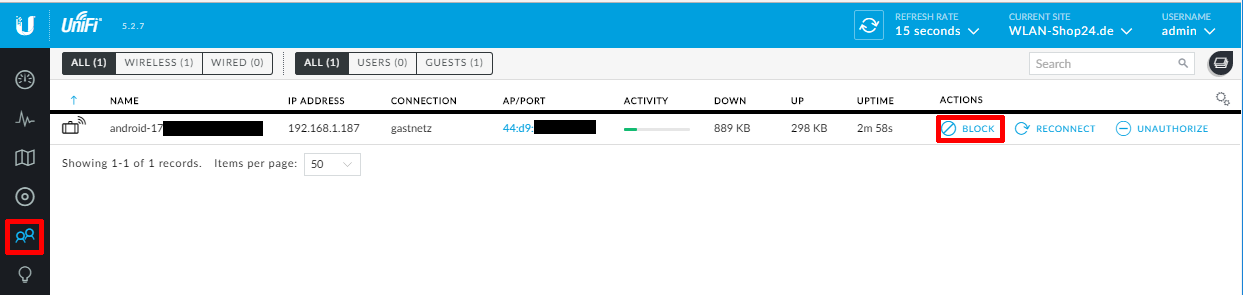
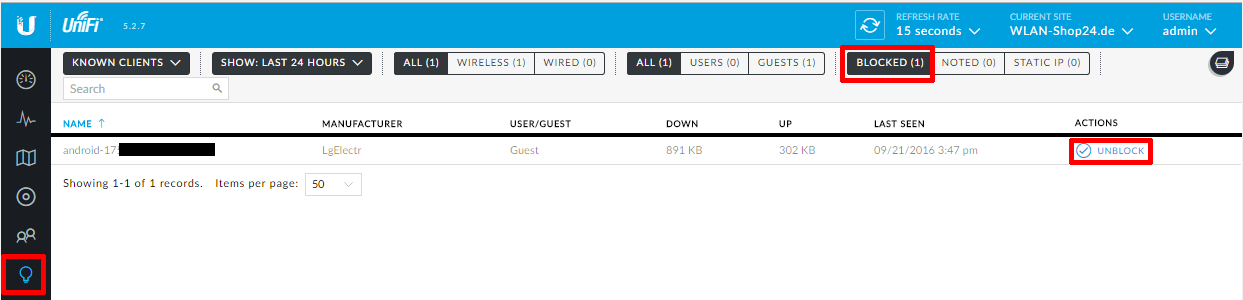
Under "Clients", you can view all connected devices and, for example, block access.
To unblock, go to the "Insights" menu, view the blocked devices, and use "Unblock" to release the devices for the network again.
Now, a few words about
WIRELESS UPLINK
After all the UAP*s have received the settings and are up to date with the firmware (the LEDs should then be solid green or blue), disconnect the relevant UAP*s from the LAN network and place them at their designated positions.
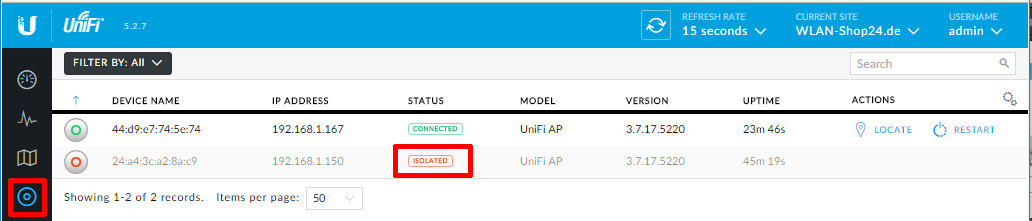
These will then appear as "Isolated" on the interface after some time.
Then, click on the corresponding row to change the settings of the affected UAP.
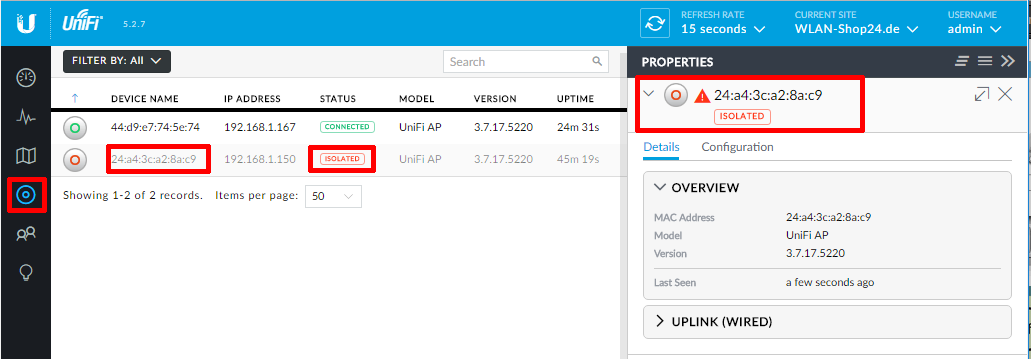
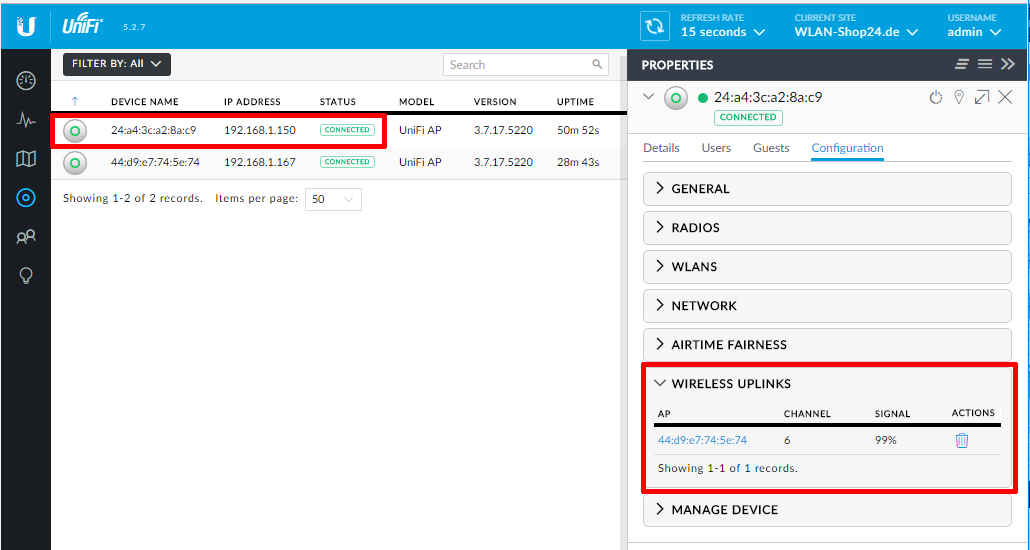
If the UAP is in Isolated Mode, you will find the "Wireless Uplink" option under "Configuration". There, the next UAP*s connected via LAN cable will appear, which you can connect to.
The percentage indicates the connection quality. If you see multiple devices, choose the one with the highest percentage. The connection will be made using the chain icon.
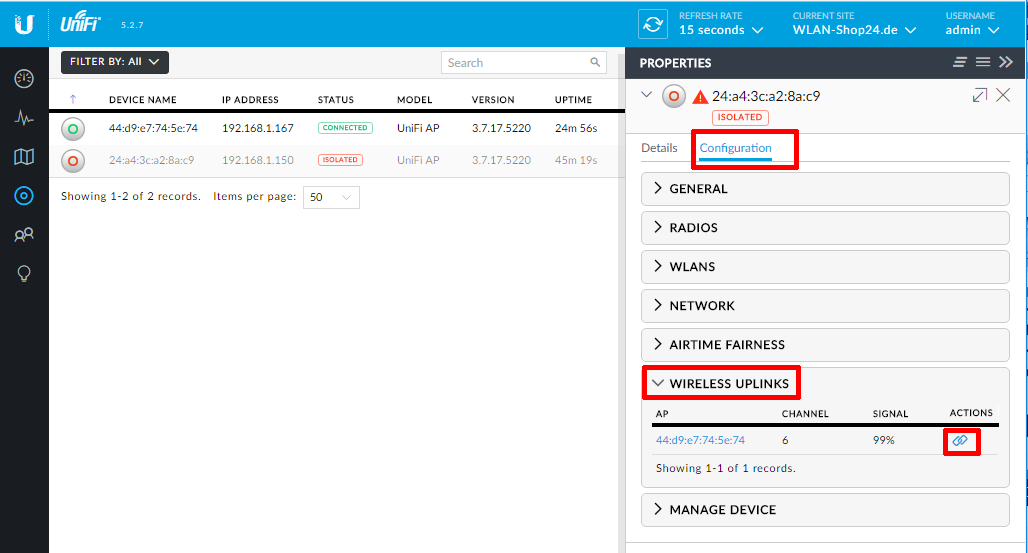
It may take a few minutes for all data to be exchanged between the devices and the connection to be established. Afterward, the UAP*s will all appear as "Connected", and a trash can icon will appear under "Wireless Uplink", allowing you to disconnect the connection.
If you have further questions or suggestions, just let us know.