Teltonika RUTX11 / RUTX12 / RUTX14 / RUT900 / RUT905 / RUT950 / RUT955 4G Router Configuration
Below, we provide you with a step-by-step illustrated guide for installing and configuring a Teltonika RUTX11 / RUTX12 / RUTX14 / RUT900 / RUT905 / RUT950 / RUT955 as an LTE / 4G router (from firmware version 00.07.00).
If you insert a SIM card without an active PIN request into the SIM1 slot, there is no need for configuration – you can start surfing immediately via network ports or WiFi. The PIN request for a SIM card can be quickly deactivated using a smartphone or another device with a SIM slot.
The WiFi name and the required WiFi key are located on a sticker or printed on the bottom of the router.
If you want to store the PIN in the Teltonika router or make other changes, the initial configuration via the router interface is as follows. Alternatively, you can also configure the router via the Teltonika Router app available in the Android or iOS app stores:
Initial Configuration
Connect to the Teltonika router via network cable or WiFi.
Open an internet browser and enter the following IP address in the address bar: 192.168.1.1
You do not need an internet connection, only a connection to the Teltonika router.
The username is: admin
The default password is: admin01
Then click Log In.
Now you need to create a new password for the router’s configuration interface.
You must enter it twice. The password requirements are: 8-32 characters long, including at least one lowercase letter, one uppercase letter, and one number.
Confirm with Submit.
You can either import the time zone from your browser or select it from the list.
Proceed with NEXT.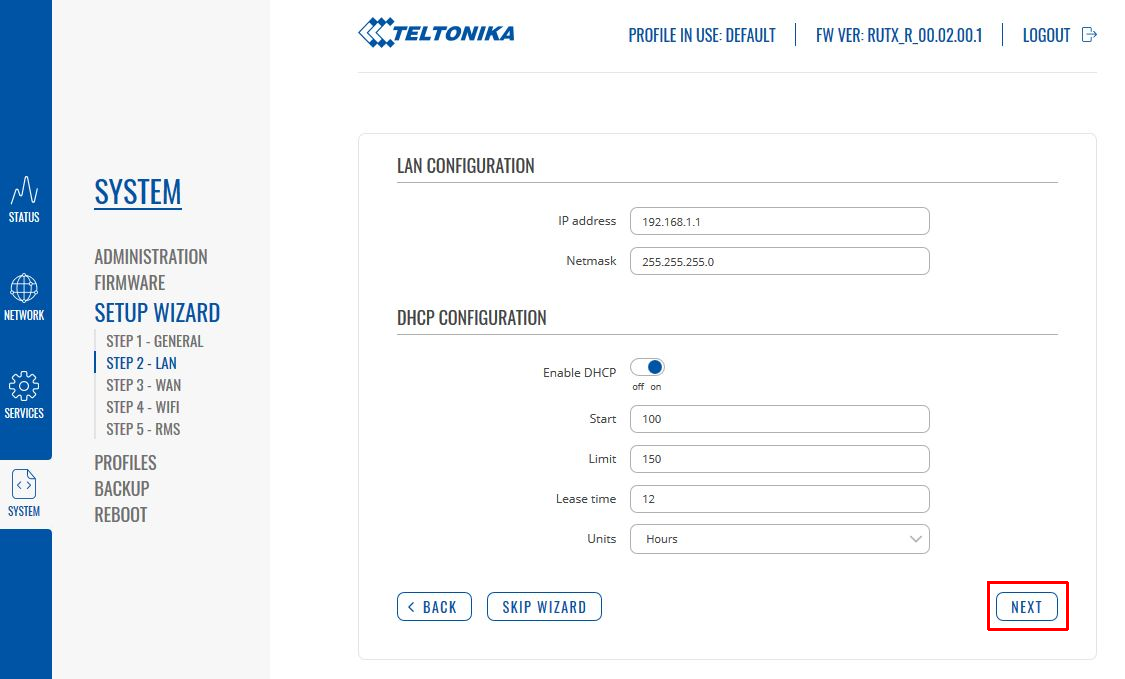
The LAN settings can remain unchanged.
Continue with NEXT.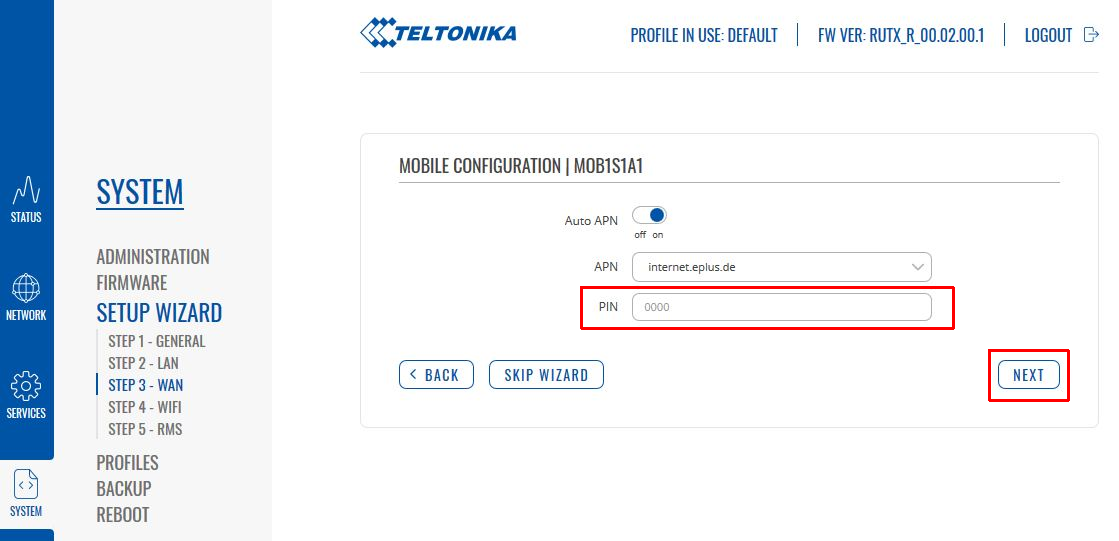
Now you have the option to enter the SIM card’s PIN number. Auto APN usually works without issues. However, you can disable this function if needed and manually enter the APN in the corresponding field.
Continue with NEXT.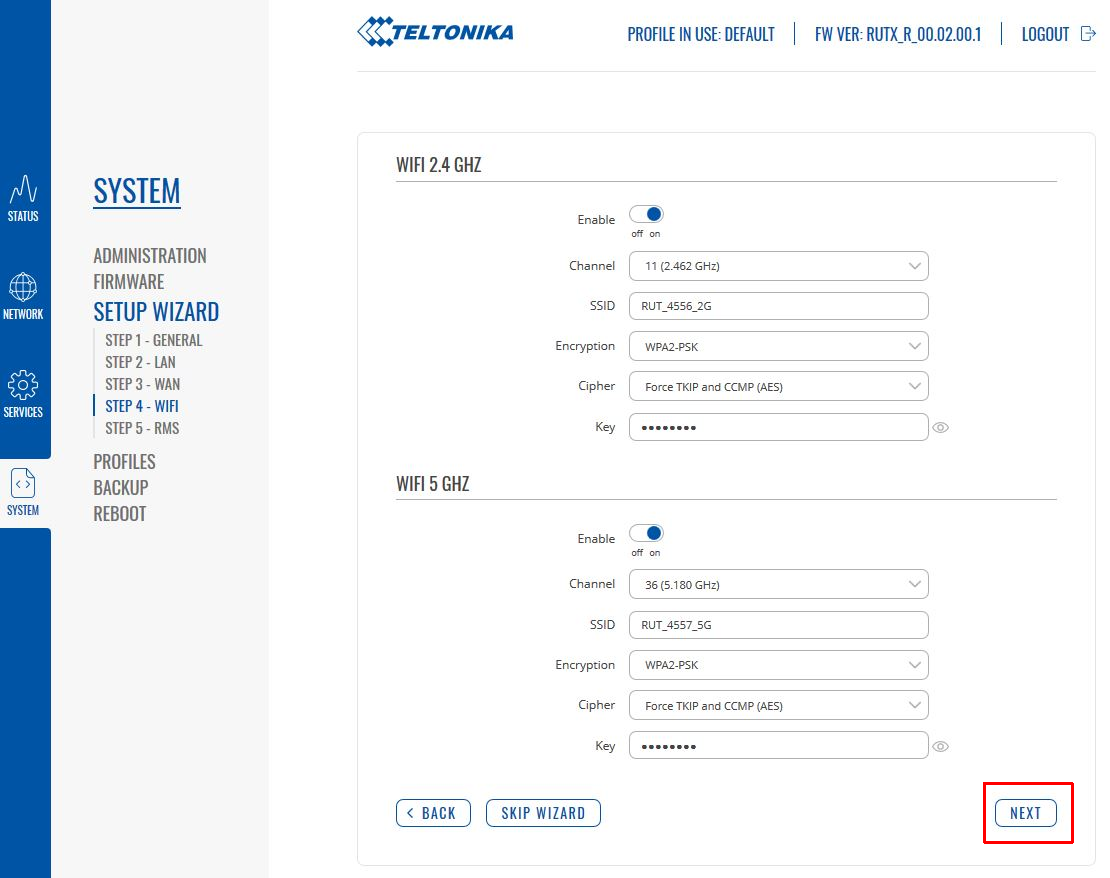
In step 4, the WiFi networks can be adjusted or disabled if needed.
With Enable "off," you can disable the respective WiFi.
SSID is the WiFi name, and Key is the corresponding WiFi password.
Confirm again with NEXT.
...
Using Two SIM Cards
If you use both SIM card slots, you can select which SIM card to use or set conditions for automatic switching via the router interface.
It is not possible to use both SIM cards for dialing in simultaneously.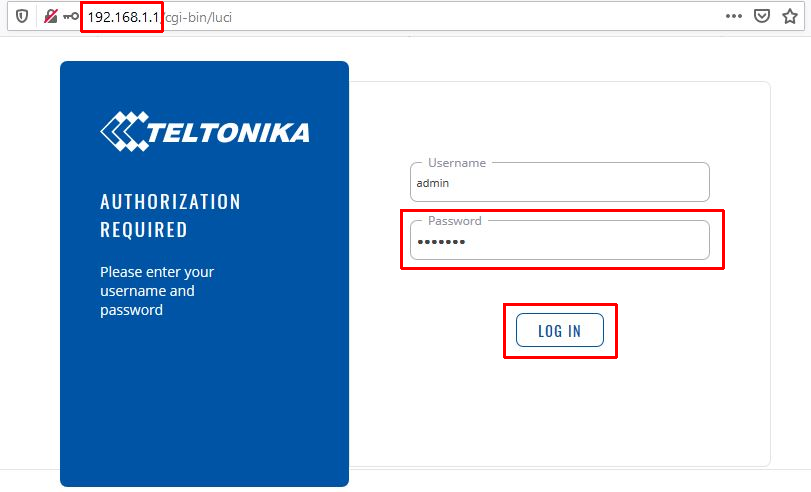
Connect to the Teltonika router via WiFi or network cable. Open an internet browser and enter the following IP address in the address bar 192.168.1.1
Login is: admin
The password is the newly assigned login password mentioned earlier.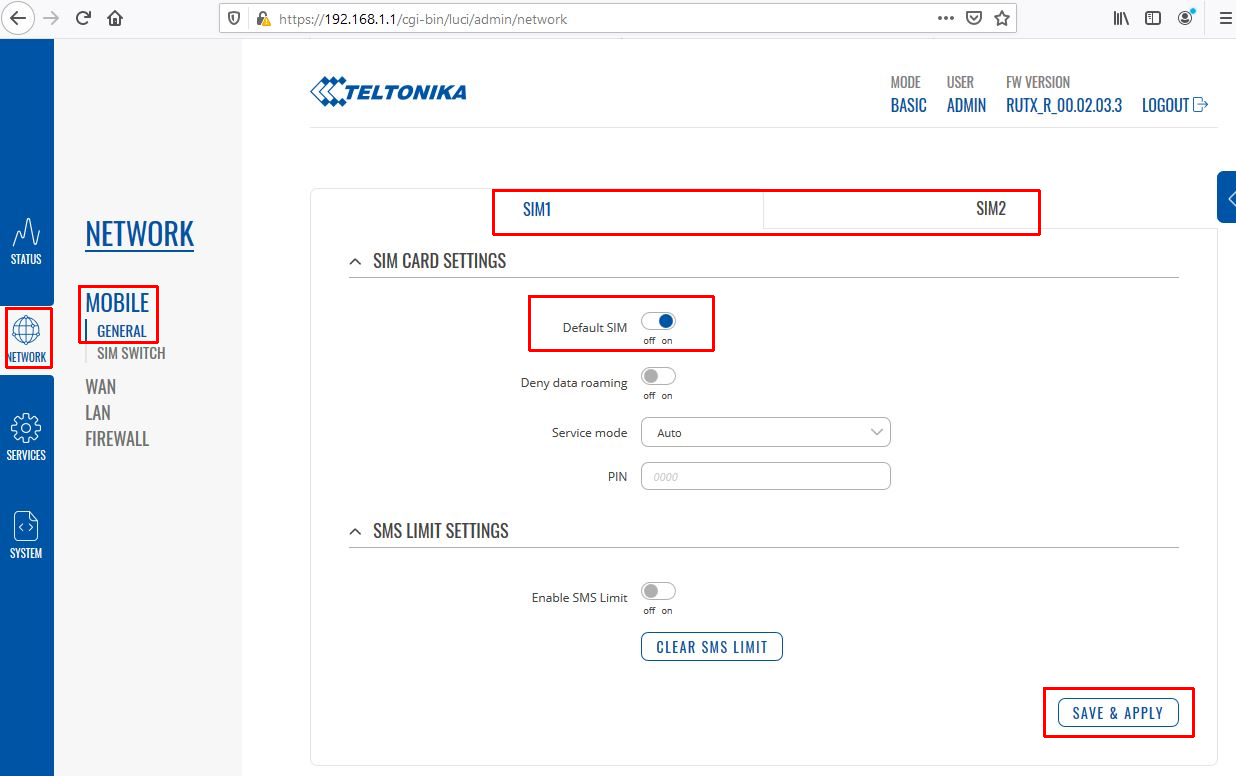
Now navigate to NETWORK -> MOBILE -> GENERAL.
Clicking on SIM1 or SIM2 allows you to switch between the respective SIM card settings.
The card set as the Default SIM is the one used first. Normally, this is SIM1.
(You can also disable roaming for the card by setting Deny data roaming to on.)
Confirm changes by clicking SAVE & APPLY.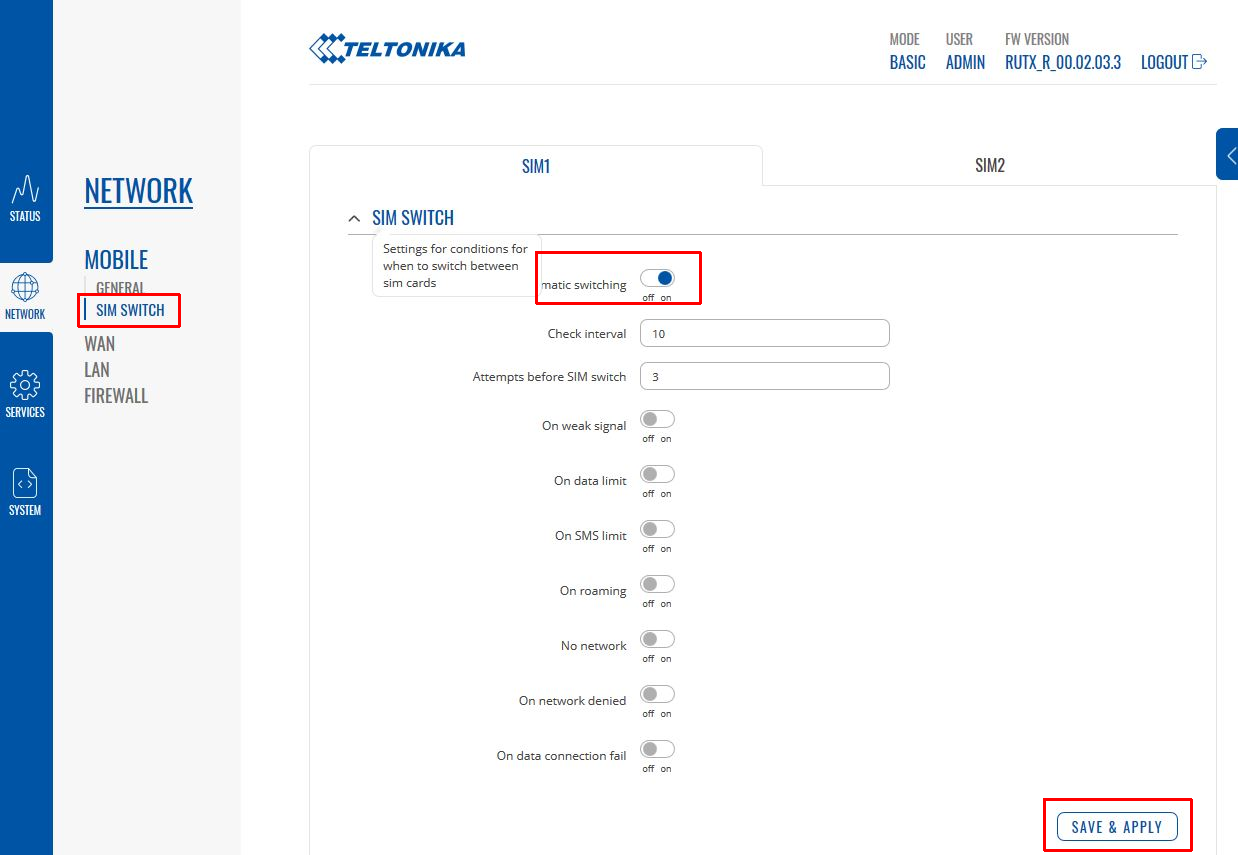
Through the SIM SWITCH submenu, you can enable automatic switching between SIM1 and SIM2 when certain conditions are met (e.g., weak signal, reached data limit, or roaming).
Activate the conditions you want to use and define the respective values if necessary.
Confirm and save settings with SAVE & APPLY.
Note that if you only configure SIM1, the device will switch automatically from SIM1 to SIM2. If you also want it to switch back from SIM2 to SIM1, you must configure the SIM2 settings accordingly and save them with SAVE & APPLY.